Pages
▼
25 December 2005
Who Am I Kidding?
With the holidays upon us, I have found myself bogged down in life. I have been managing a retail store for the past year and it's been... difficult to do anything else since Thanksgiving. The HotRod is repaired but it will need to stay in the case until January whilst I see to my family obligations.
I hope you are all having a Happy Christmas, and I will see you in the new year!
Scott
08 December 2005
Artistic Thumb-Twiddling
We're waiting on a part for the hot rod. I guess that's the price we pay for computerizing the heck out of even things so simple as a sewing machine. They make our lives simpler, right? That's what I've heard, but I'm not sure I believe it. Incidentally, I'm also waiting for the truck tire to come in because I have custom wheels so I'm pretty much stuck here with not much to work on...
My apologies for the delay(s).
Since I'm essentially down to the artistic form of thumb-twiddling, I've been puttering with some other projects. Thanks to the miracle of Polymer Clay an artist doesn't require a kiln and a million dollars worth of equipment to experiment in the realm of sculpture. We've spent the last year concentrating on the inside of our new home, and now it comes time to look to the outside of the place.
One of the ideas I had was to do a row of sculpted faces along the front rather akin to gargoyles (though they would technically be called 'Grotesques' since they won't be used to manage the water flow off our roof). We are looking to add a fantasy/storybook touch to our otherwise architecturally unremarkable domicile. I'm of a mind to make them reflective of the seasons, rather akin to the four seasons painted by Mucha. I have a thing for Art Deco and Art Nouveau for some reason. Of course, the would be much more gothic than Mucha, but he was the inspiration.
Here are some pictures of the first study I did in polymer clays...
The final pieces will be sculpted in polymer clay (I use Super-Sculpy) and then cast in mortar or concrete using a silicone mold. My father in law has a lot of experience casting in concrete and I'll be looking to him for help.
In the meantime, my sketchbook is active... in case you were worried that I would never get back to the doublet diary with all these tangents. Just - you know - life getting in the way.
If the hotrod isn't fixed soon, I'll dig out the old (and highly cantankerous) machine or bite the bullet and sew the daggum thing by hand.
Scott
05 December 2005
02 December 2005
Snow Day Redux...
I just found out my wife had never built a snowman before!! Egad! I wonder why she never told me?! Hmmmm... could it be because she knew I'd throw a bag over her head and when I took it off, we'd be somewhere deep in the heart of northern Wisconsin? Nah, that can't be it. So anyway - of course - it was a moral imperative to drag her out in the cold and wet and force her to build a snowman with me... not that she needed much coaxing, mind you, but it did eat up all my free time this morning.
So, no sewing for yet another day, but fun was had, and that's what this is all about! Fun.
Yeah... We prototype everything around here...So, no sewing for yet another day, but fun was had, and that's what this is all about! Fun.
Egad! It's Gatsby!
Oh wait, no... it's only Scott.
Cheers, everyone!
Scott
01 December 2005
Taking a Snow Day
It is snowing in the Puget Sound region which doesn't happen very often! So I'm going outside to play. Back tomorrow with a real update!!
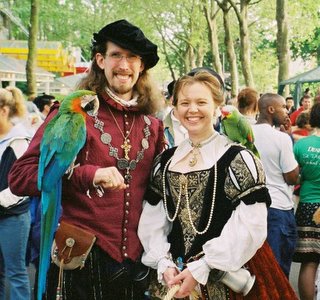
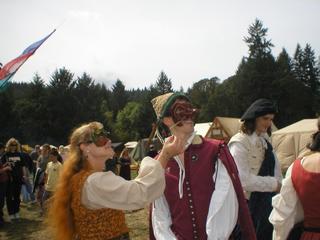
Meanwhile enjoy this old picture I found on the hard drive of my old laptop of my wife & I shilling for the Washington Ren Faire at Seattle's "Folk Life Festival". Someone thrust a couple of parrots at us and took our picture.
Kristin is - as always - ravishing. I am... moderately well turned-out. That was one of the first five doublets I ever made, I think. The tabs at the collar were intended as an ad hoc supportasse for a ruff I never got around to making. The burgandy cotton is quilted so I still wear it when there's a nip in the air. The collar is made from plaque belts that I combined to (I think) good effect. I need to find a better picture of Kristin in that dress. The rusty velvet skirts are amazing, especially in the sunlight. I learned everything I know about sizing patterns mocking that bodice for her, which is a modification of one of Margot Anderson's.
God, was my hair ever really that long?
I look like Geddy Lee in garb.
-Scott
29 November 2005
OT - Thankful?
NOTE: This was written Thanksgiving day between referencing cookbook sites.
Back to doublet-ing on Thursday...
------------------------------
This has been a difficult year, no lie. And on a day when we’re supposed to be tallying up the things we’re thankful for, the struggles of 2005 are thrown into sharp relief. We started the year on a high note, with a new house and a new job for me. Then our cat Coppertop died. But that tragedy had at its core a moment of befuddling joy because that was also the day I found out we were expecting a little one. In the end, that didn’t work out either.
With one thing and another, there were other obstacles. Kristin is still commuting five hours a day. When gas hit $3.00 a gallon I won’t tell you it wasn’t a hardship. There have been other things. The kitchen fire, car trouble, and we nearly lost Figaro recently. Each thing just one more reason to be glad when 2005 is in the rearview mirror.
But Thanksgiving isn’t about hardships. It’s about thankfulness.
The real question we must pose is “What do we have to be thankful for?” This is an important question because life is full of struggle and turmoil, a veritable potpourri of pain and suffering. Why then be thankful? How is it that one day a year, we can sit back and acknowledge that the glass really is half-full? Simply put… we can’t.
I can prophesy a chorus of depressed sighs and the rattle of shaking heads as my readers get to those words. But oh, you mistake me. I am not of the opinion that optimism is dead or even illogical. In fact, I find optimism to be the only logical state of being. I shall repeat what I said, only with the stress in the appropriate places. “How is it that one day a year, we can sit back and acknowledge that the glass really is half-full?” We can’t.
One day a year. That is my protest against most holidays. Not that the people being lauded on mother’s day or father’s day, or Breast Cancer Awareness day aren’t worth thinking about. Do not mistake me. What upsets me is that for too many people, those days are the only days of the year we acknowledge their contributions. So it is too with thankfulness.
That things are going to happen is inevitable. That the bad will occasionally pile up is simply an expression of the law of averages. And once a year, the national attention turns to finding things to be thankful for. Once a year is too few. We should be thankful every day.
In a year when bad things happened to us, one upon the other, I found myself searching harder and harder each day for the reasons I shouldn’t rage against the terrible awfulness of it all. Back in August I wrote an article about acting at renaissance faire and waxed lyrical about how each morning, despite the fury of the hay fever raging inside my head, I chose to be happy, to be go-lucky, to be a madcap man in striped socks, bringing smiles to the faces of children and adults alike. That is a good microcosm of how I’ve approached life this year.
Each and everything that has happened to us was horrible. I can’t get around that. I won’t ignore it or understate it. The darkest day of my life was the day we lost the baby. I thought I was at the bottom of a hole I could never climb out of. But a day or two later, I had to get back in the truck and go to work.
I work with a crowd of women, most of whom are my mother’s age. They have seen turmoil in their lives to beggar description. One has suffered more than ten miscarriages, one lost her adult daughter in a car wreck 25 years ago. Yet not one of them intimated that their suffering had been greater than ours. They all hugged me, and cried with me, and helped me find an attitude that allowed me to get the work done. I still struggle with it. I still cry about it from time to time.
Intellectually, I know that the only thing you can control about misfortune is how you react to it. Your attitude is yours to control. But until you’ve put it to the test you’ve no idea how hard that really is to do. But it is possible. One of my heroes, Peter Ustinov once said :
Bad things happen once in awhile. Good things happen every day. The psychic footprint of bad things is so large that it often overshadows that fact. Each day is a day of wonders and miracles. Each day we are swept along in the slipstream of science and technology, of modern wonders whose impact is as great as it is ubiquitous. We are surrounded by the wonders of nature, the grace and glory of the Creator in the changing leaves and the growing grass.
Perhaps holidays really are necessary. Perhaps this hum of the modern world needs to die down once in awhile for us to truly have a second to breathe, to appreciate what we have and get an iota of perspective on it. Maybe it takes a special day for our modern lives to see the leaves as more than something that needs raking and the grass as something more than another hour pushing a lawnmower.
Despite the turmoil of the year I am still thankful for every day. I still sip at the cup of wonder that is too hot to take all in one gulp. Yet this holiday will end. The turkey will become sandwiches and the family will disperse back to their daily haunts. I ask only this: each morning remember that as you’re drinking your morning coffee that what you’re really holding in your hands is a miracle of nature, the perfect conglomeration of agriculture, commerce, chemistry and engineering. If you don’t drink coffee, find some other ritual to remind you to be thankful for all we have, but choose a mind-set of wonder each day.
I have Kristin. (and I have Scott. -K 8-) )
I have a family that loves me.
I have a roof over my head.
I have books to read and ideas to write.
I have coffee in my mug.
I have a new kitten to frustrate and amuse me.
I have an old cat to give me love and perspective on my true place in the universe.
I have the infinite possibilities that we will be blessed again someday with a child, something I once thought impossible.
I have a garden that is still blooming roses and brings me joy.
I have birds to watch in the bird feeders (I think the cats are thankful for that also)
And I have you, my loyal readers.
What more could anyone ask for?
I wish you all good eats, good day, and God bless.
-Scott
Back to doublet-ing on Thursday...
------------------------------
This has been a difficult year, no lie. And on a day when we’re supposed to be tallying up the things we’re thankful for, the struggles of 2005 are thrown into sharp relief. We started the year on a high note, with a new house and a new job for me. Then our cat Coppertop died. But that tragedy had at its core a moment of befuddling joy because that was also the day I found out we were expecting a little one. In the end, that didn’t work out either.
With one thing and another, there were other obstacles. Kristin is still commuting five hours a day. When gas hit $3.00 a gallon I won’t tell you it wasn’t a hardship. There have been other things. The kitchen fire, car trouble, and we nearly lost Figaro recently. Each thing just one more reason to be glad when 2005 is in the rearview mirror.
But Thanksgiving isn’t about hardships. It’s about thankfulness.
The real question we must pose is “What do we have to be thankful for?” This is an important question because life is full of struggle and turmoil, a veritable potpourri of pain and suffering. Why then be thankful? How is it that one day a year, we can sit back and acknowledge that the glass really is half-full? Simply put… we can’t.
I can prophesy a chorus of depressed sighs and the rattle of shaking heads as my readers get to those words. But oh, you mistake me. I am not of the opinion that optimism is dead or even illogical. In fact, I find optimism to be the only logical state of being. I shall repeat what I said, only with the stress in the appropriate places. “How is it that one day a year, we can sit back and acknowledge that the glass really is half-full?” We can’t.
One day a year. That is my protest against most holidays. Not that the people being lauded on mother’s day or father’s day, or Breast Cancer Awareness day aren’t worth thinking about. Do not mistake me. What upsets me is that for too many people, those days are the only days of the year we acknowledge their contributions. So it is too with thankfulness.
That things are going to happen is inevitable. That the bad will occasionally pile up is simply an expression of the law of averages. And once a year, the national attention turns to finding things to be thankful for. Once a year is too few. We should be thankful every day.
In a year when bad things happened to us, one upon the other, I found myself searching harder and harder each day for the reasons I shouldn’t rage against the terrible awfulness of it all. Back in August I wrote an article about acting at renaissance faire and waxed lyrical about how each morning, despite the fury of the hay fever raging inside my head, I chose to be happy, to be go-lucky, to be a madcap man in striped socks, bringing smiles to the faces of children and adults alike. That is a good microcosm of how I’ve approached life this year.
Each and everything that has happened to us was horrible. I can’t get around that. I won’t ignore it or understate it. The darkest day of my life was the day we lost the baby. I thought I was at the bottom of a hole I could never climb out of. But a day or two later, I had to get back in the truck and go to work.
I work with a crowd of women, most of whom are my mother’s age. They have seen turmoil in their lives to beggar description. One has suffered more than ten miscarriages, one lost her adult daughter in a car wreck 25 years ago. Yet not one of them intimated that their suffering had been greater than ours. They all hugged me, and cried with me, and helped me find an attitude that allowed me to get the work done. I still struggle with it. I still cry about it from time to time.
Intellectually, I know that the only thing you can control about misfortune is how you react to it. Your attitude is yours to control. But until you’ve put it to the test you’ve no idea how hard that really is to do. But it is possible. One of my heroes, Peter Ustinov once said :
“I am an optimist, unrepentant and militant. After all, in order not to be a fool, an optimist must know how sad a place the world can be. It is only the pessimist who finds this out every day.”
Bad things happen once in awhile. Good things happen every day. The psychic footprint of bad things is so large that it often overshadows that fact. Each day is a day of wonders and miracles. Each day we are swept along in the slipstream of science and technology, of modern wonders whose impact is as great as it is ubiquitous. We are surrounded by the wonders of nature, the grace and glory of the Creator in the changing leaves and the growing grass.
Perhaps holidays really are necessary. Perhaps this hum of the modern world needs to die down once in awhile for us to truly have a second to breathe, to appreciate what we have and get an iota of perspective on it. Maybe it takes a special day for our modern lives to see the leaves as more than something that needs raking and the grass as something more than another hour pushing a lawnmower.
Despite the turmoil of the year I am still thankful for every day. I still sip at the cup of wonder that is too hot to take all in one gulp. Yet this holiday will end. The turkey will become sandwiches and the family will disperse back to their daily haunts. I ask only this: each morning remember that as you’re drinking your morning coffee that what you’re really holding in your hands is a miracle of nature, the perfect conglomeration of agriculture, commerce, chemistry and engineering. If you don’t drink coffee, find some other ritual to remind you to be thankful for all we have, but choose a mind-set of wonder each day.
I have Kristin. (and I have Scott. -K 8-) )
I have a family that loves me.
I have a roof over my head.
I have books to read and ideas to write.
I have coffee in my mug.
I have a new kitten to frustrate and amuse me.
I have an old cat to give me love and perspective on my true place in the universe.
I have the infinite possibilities that we will be blessed again someday with a child, something I once thought impossible.
I have a garden that is still blooming roses and brings me joy.
I have birds to watch in the bird feeders (I think the cats are thankful for that also)
And I have you, my loyal readers.
What more could anyone ask for?
I wish you all good eats, good day, and God bless.
-Scott
22 November 2005
Crewel World
Sorry for the obvious pun.
Since I'm still waiting for The Hotrod to get it's act together, I decided to keep myself from getting either too bored or too wrapped up in any video games by taking up the embroidery needle. Yeah, I called our sewing machine "The Hotrod" I told this was a guy's sewing site.
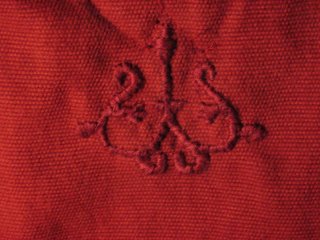
Anyway, for fun I did a raised satin stitch embroidery at the base of the neck using 1/4 of the tile design I used on my rapier carrier. Why at the base of the neck? No reason. I just thought it echoed the lines of the quilting and would look good there. Also there wouldn't be anything covering it up (baldrics and the like tend to cover the chest).
And - for those who didn't get the pun - this kind of embroidery is known (collectively) as "crewel work".
Mostly, I'm practicing because I plan to do some hand-embroidery on the final noble garment and I haven't done any embroidery in awhile.
It sort of looks like a glyph or
protective ward of some sort, doesn't it?
Speak this glyph and summon Great Cthulhu
from his watery home...
protective ward of some sort, doesn't it?
Speak this glyph and summon Great Cthulhu
from his watery home...
This shot is just to show the orientation.
I don't really plan to do any more, this is sort of a one-off
because I was bored and had a needle and thread handy...
I don't really plan to do any more, this is sort of a one-off
because I was bored and had a needle and thread handy...
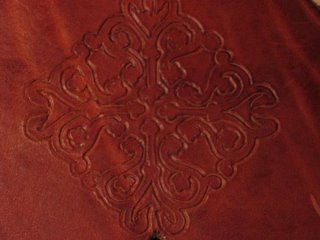
A closeup of the (complete) design as
I incised it in the leather of my rapier carrier.
Oh! And for the record: Not all that long ago I said something to the effect of I avoided hand stitching if it wouldn't be better that way than doing it on the machine... I wanted to make it clear thatI don't think my embroidery is better than what a machine can do. Quite simply put: We don't have an embroidery machine so Scottie gets to practice his stitches.
21 November 2005
Clothes Mocketh the Man...
There comes a time when sewing is no longer a solitary activity. So it is with mocking up and fitting patterns. The pattern I use is one I drafted a long time ago and I've lost weight and my desires have changed somewhat as to what I want the thing to look like, fit like, and be able to do. For the looser jerkin which will be worn over a doublet, the old pattern was fine. Since I lost weight proportionally across my frame, the largeness of it was consistant (if that makes any sense) so it suits me fine as an outer garment. For the more form-fitted doublet, that is not the case and I find myself in the predicament of needing a partner to help me re-size the thing.
Now, I've done this for others numerous times and been the guy who poked and grumbled at the 'model' for fidgeting and moving and generally being alive. Well, for all those out there who've had their garments fit by yours truly, rejoice... my uppance has come.
As I've mentioned in the past, I'm not going to get into drafting a pattern from scratch (at least not right away) for several reasons:
I laid out the pattern in the usual way on the eggplant denim. This dark heavy fabric has roughly the same body as the final doublet material and is dark enough to see the white chalk lines. If you're using lighter material, use blue chalk. It's not that big a deal, really. White lines on dark fabric photograph better and I'm doing everything with half an eye on how it will look on this site.
I cut out my pattern with an overly-generous seam allowance. (Sometimes, the angle of the entire seam will need to change and a the extra material will allow for this.) Then I basted the thing together with a nice long stitch length. Then I put it on and pin it together in a manner replicating how it will be when it has button holes.
In the following photos you may notice that I added an extra seam up the back. I can't remember if I mentioned that when I was discussing plans for the doublet. Every seam you have is one more point of adjustment and makes the fit that much more tailored. Some patterns I've noticed have a back seam, a 'princess' seam, and a side seam, allowing a maximum degree of adjustment. There is such a thing as overkill. At some point your doublet starts to resemble a patchwork quilt.
At each seam, pull the wrinkly slack out of the fabric and pin it. We used safety pins here, I've had good luck doing this with binder clips as well. Look for puckers and obvious fit issues and play with the seams until they're gone.
Keep in mind that everytime you adjust the back or the front piece, you need to keep an eye on your shoulder and neck seams lest they be pulled too far forward or back. Communication between the pinner and the pinned is essential and why doing this over a dress form or duct-tape dummy is not as desireable as having your clothing fit to you. If the collar is choking you, or if the armscrye is too tight and cutting off circulation to your sword arm, the dummy won't tell you.
When you get the fit like you want it, take the chalk and trace along the pinned lines. These will be the place for your new seams.
While you're doing this, the person whose doublet this will be needs to goof around a little. It goes back to what I was saying about making certain your doublet will do everything it will be called to do. Do you need to fence in it? Wear it under armor? Swing from a chandelier? Climb trees? Think of all the things you could possibly need to do and do them, or at least simulate them. Then ask your tailor to make the appropriate adjustments before you take it off. It should be snug, but not too tight to move.
Once the sewing machine in back from the shop, I will baste seams along the chalk lines. Then one more fitting like this one to mark any easements I will need in terms of making or moving the armscrye, collar etcetera (these things move a little when you do that)
---------------------------
All my life I've had trouble buying suits off the rack and I never understood why until I learned to sew. Now that I've fitted and drafted patterns to my bony carcass, I understand why. I'm all torso, which makes pairing up a jacket and slacks difficult without looking like Dick Van Dyke in Mary Poppins when he's dancing with the penguins. Which isn't a good look for anyone, in the renaissance or whenever.
I sometimes wax prosaic about why we differentiate between a costume and garb. A key part of what makes an outfit cross the costume/garb barrier is fit.
In my mind, Costumes are put together to look good for a short time. Some of them look spectacular for thier intended lifespan: the run of a play, the costume ball, or even the run of a season of faire. But it's in the final weekend of a three-weekend faire that you begin to see the difference between costume and garb. If your faire lasts more than a month, the people wearing costumes suffer like a sprinter who entered a marathon and thought they were doing well because they led the first half of the race. Marathons are won in the final mile.
I have nothing against costumes per se. But if you sew your renaissance wear like I do, with fit and function as your watchwords, stressing wearability and endurance... well, you'll be wearing clothing, not costume. And - for me at least - that makes all the difference.
-Scott
Now, I've done this for others numerous times and been the guy who poked and grumbled at the 'model' for fidgeting and moving and generally being alive. Well, for all those out there who've had their garments fit by yours truly, rejoice... my uppance has come.
As I've mentioned in the past, I'm not going to get into drafting a pattern from scratch (at least not right away) for several reasons:
- I don't need a (completely) new pattern at the moment.
- There are so many others out there who have explained it so well that I would be re-inventing the wheel.
- I find the process tedious.
CAVEAT: This is how I do this. Kris informs me that there are numerous other ways in which this is and can be done. Also, by the time I'm finished it is quite possible that it would have been less effort to just draft a new pattern. Stubbornness, thy name is Scott.Since Kristin was one of the first victims of my tailoring pins, it's fitting (pun intended) that she gets to be the tailor this time around.
I laid out the pattern in the usual way on the eggplant denim. This dark heavy fabric has roughly the same body as the final doublet material and is dark enough to see the white chalk lines. If you're using lighter material, use blue chalk. It's not that big a deal, really. White lines on dark fabric photograph better and I'm doing everything with half an eye on how it will look on this site.
I cut out my pattern with an overly-generous seam allowance. (Sometimes, the angle of the entire seam will need to change and a the extra material will allow for this.) Then I basted the thing together with a nice long stitch length. Then I put it on and pin it together in a manner replicating how it will be when it has button holes.
CAVEAT: When you are doing this, remember that you need to account for a final seam allowance. Wherever the rough edge of your fabric is, the real edge will be a 1/4 to 1/2 inch back depending on your preferred allowance. If you don't account for this in the fitting, it will be too small when you've got it put together into a final piece.
While you're doing this, the person whose doublet this will be needs to goof around a little. It goes back to what I was saying about making certain your doublet will do everything it will be called to do. Do you need to fence in it? Wear it under armor? Swing from a chandelier? Climb trees? Think of all the things you could possibly need to do and do them, or at least simulate them. Then ask your tailor to make the appropriate adjustments before you take it off. It should be snug, but not too tight to move.
Once the sewing machine in back from the shop, I will baste seams along the chalk lines. Then one more fitting like this one to mark any easements I will need in terms of making or moving the armscrye, collar etcetera (these things move a little when you do that)
---------------------------
All my life I've had trouble buying suits off the rack and I never understood why until I learned to sew. Now that I've fitted and drafted patterns to my bony carcass, I understand why. I'm all torso, which makes pairing up a jacket and slacks difficult without looking like Dick Van Dyke in Mary Poppins when he's dancing with the penguins. Which isn't a good look for anyone, in the renaissance or whenever.
I sometimes wax prosaic about why we differentiate between a costume and garb. A key part of what makes an outfit cross the costume/garb barrier is fit.
In my mind, Costumes are put together to look good for a short time. Some of them look spectacular for thier intended lifespan: the run of a play, the costume ball, or even the run of a season of faire. But it's in the final weekend of a three-weekend faire that you begin to see the difference between costume and garb. If your faire lasts more than a month, the people wearing costumes suffer like a sprinter who entered a marathon and thought they were doing well because they led the first half of the race. Marathons are won in the final mile.
I have nothing against costumes per se. But if you sew your renaissance wear like I do, with fit and function as your watchwords, stressing wearability and endurance... well, you'll be wearing clothing, not costume. And - for me at least - that makes all the difference.
-Scott
14 November 2005
Mustard Doublets & Eggplant Mockups
Almost sounds like I'm making a salad, doesn't it?
Feline emergencies have subsided. We even gave Figaro his final pill last night! So I took advantage of the quiet to do some quick sewing. The sleevelets are on the jerkin, I nipped the trim around the collar, tucked in loose ends, and did the 'clean up' stitching that I always find necessary at this stage of any project. The jerkin's to the point where I need to make the doublet before I sew on the buttons and whatnot.
I know, I know. I said I was going to be doing the buttons and buttonholes next. However, button holes are a pain to sew by hand (they never come out right on the machine) but they get easier after about ten or so when I find my stride. To wit: it will be easier to accomplish if I do the buttonholes for both the jerkin and the doublet at the same time.
So... on to the doublet!
As you might recall, the doublet will be a mustard color with a butterscotch lining. The lines will be very simple with no epaulets or peplum and a light adornment with simple embroidery stitches used sparingly.
Beginner Tips: "Mocking Up"I skipped this step with the jerkin, taking it on faith that the twelve doublets and jerkins I've made using variations of this same pattern would stand up to any difficulties I might face. Little did I anticipate collar problems. My mistake.
I want to modify the pattern slightly (again) to try to incorporate some of what I learned making the jerkin's collar. (No, this one won't be quilted, but still...) So - since I learn from my mistakes - I will be making a quick mockup out of some extra fabric we have lying around.
For the record:
I will be splitting the back seam rather than cutting it out as a single piece. This should allow some shaping and better control of the silhouette. As the outter garment, the jerkin doesn't need to have as much form, but the doublet will be a simpler machine - so to speak - so the tailoring must speak for itself.
Feline emergencies have subsided. We even gave Figaro his final pill last night! So I took advantage of the quiet to do some quick sewing. The sleevelets are on the jerkin, I nipped the trim around the collar, tucked in loose ends, and did the 'clean up' stitching that I always find necessary at this stage of any project. The jerkin's to the point where I need to make the doublet before I sew on the buttons and whatnot.
My poor battered old gorget isn't really a part of this costume.
I put it on there to 'frame' the collar
(because I thought it made a better picture)
I put it on there to 'frame' the collar
(because I thought it made a better picture)
I know, I know. I said I was going to be doing the buttons and buttonholes next. However, button holes are a pain to sew by hand (they never come out right on the machine) but they get easier after about ten or so when I find my stride. To wit: it will be easier to accomplish if I do the buttonholes for both the jerkin and the doublet at the same time.
So... on to the doublet!
As you might recall, the doublet will be a mustard color with a butterscotch lining. The lines will be very simple with no epaulets or peplum and a light adornment with simple embroidery stitches used sparingly.
Beginner Tips: "Mocking Up"I skipped this step with the jerkin, taking it on faith that the twelve doublets and jerkins I've made using variations of this same pattern would stand up to any difficulties I might face. Little did I anticipate collar problems. My mistake.
I want to modify the pattern slightly (again) to try to incorporate some of what I learned making the jerkin's collar. (No, this one won't be quilted, but still...) So - since I learn from my mistakes - I will be making a quick mockup out of some extra fabric we have lying around.
For the record:
I hate prototyping something in muslin when the final fabric won't be muslin weight. It's a rule with me. It just doesn't make sense to me to expect a muslin mockup to fit the same as a final piece when the final will be of a heavier denier fabric!! It's a little more expensive to use heavier fabric for these prototypes (called 'Toile' in period, I believe) but it pays off in stress-reduction in the long run.A few years ago we wound up with an abundance of eggplant-colored denim from a clearance table. So I'll be making an eggplant-colored prototype which I may or may not finish into a final completed piece. (It looks violet, but believe me, it's really eggplant).
I will be splitting the back seam rather than cutting it out as a single piece. This should allow some shaping and better control of the silhouette. As the outter garment, the jerkin doesn't need to have as much form, but the doublet will be a simpler machine - so to speak - so the tailoring must speak for itself.
12 November 2005
Irony, thy name is Cat
I went to great lengths a few days ago telling ya'll to watch their kitties while they're sewing. (I was born in Missouri, I have every right to use the word "ya'll" thank you very much) The title of the tip was "Cats Can't Spit" which is true: if a kitty gets a strand of embroidery floss or thread caught in his mouth, he can't get rid of it. The backward facing hairs on his tongue which make it ideal for grooming are death-dealers when they catch on something he'd rather not swallow. Much as he tries to work them out, the hairs pull them in. (Here's the ironic part) Ever tried to give a cat a pill? Oh they can spit alright! If it's medicine, they can launch it into next Tuesday and bite you in the process.
Every night as we're trying to force a pill down Figaro's throat I am haunted by the words 'Cats Can't Spit'.
God has a strange sense of humor.
Sigh.
08 November 2005
The Terrible Tangent
This past weekend, my accessories tangent staged an overthrow and seized control of my project time. I've been looking at the paintings of Sr. Moroni and noticed that almost all of the men of distinction (with the exception of the man in the painting I'm basing this outfit on) are holding books and other items of scholarship. I love books. I used to run a bookstore. I write novels in my (allegedly) spare time.
So... my new garb needed a book. A Psalter to be exact.
So I dove into my extensive library and came out with Hand Bookbinding, A Manual of Instruction by Aldren Watson (Dover, 1986 ISBN# 048629157X). Yes I happened to have a manual of bookbinding on the shelf. I'm a rennie and a bibliophile. I also have a book that would allow me to replicate Nelson's Flagship to the last nail. I also came up with a copy of the Vulgate Latin Psalms I printed off a no-longer extant website a few years ago. Good to go.
Since this is my first book, I decided to bind it blank and make it a sort of journal, just to try my hand at the art and craft of bookbinding and be certain I could do it before I put any real effort into a latin psalter. I never do anything half-way, though, so I spent a bit of time tracking down some scrap leather as well as coming up with a clasp and corners to provide the right look I was going for.
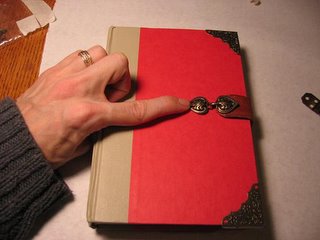
For a few years I've been mulling over the idea of binding a book or two, so over all that time I've collected oddments I thought would be good for the future book I was planning. Sometimes it takes years before I've collected enough in my Venus Flytrap of an imagination to start work. Certainly that's the case here. The corners are box corners I found at a craft store on closeout last year. They're thin enough metal to manipulate a little to make them more suitable for a book. The clasp is a fairly standard La Mode clasp from the fabric store, and the leather strap is leftover from making my rapier hanger a few years ago.
The book will be a small one, an "Octavo" it's called, meaning that the paper making up its pages have been folded in half twice so that - once they are cut - they make eight pages. The cuts were all done by running the back of a butter knife along a creased edge, giving the paper that ragged look which modern binders call the "deckle" which is just a fun word to say. If you do it right, you're left with individual rectangles creased down the center, which are stacked to look like a little pamphlet. The individual section is called a "bifolio" and together they form a "quire" or "signature". The signatures are stacked and sewn to a series of cords using something that looks a lot like a chain stitch. Some books also feature signatures sewn to one another with what looks like a buttonhole stitch.
I will be raiding my wife's supply of resume paper for paper of the correct weight and cotton-rag content. I'm working with 14 signatures of 4 bifolium each. I stacked them and drew a line down the spines of the signatures and then pricked them along the three lines as I will be doing a three-cord binding. The pricks in the paper will allow the sewing to take place without having to force my way through multiple layers of paper with each pass of the needle.
One of the things I found in the magpie stage of my bookbinding planning was a frame which - with some suitable modification - makes a smashing good sewing frame for the binding of books. Keeping the cords taut makes sewing to them much easier. (Yes, that link shows a slightly different method than I used here) The dowel along the top allows me to tighten the cords which are secured to the frame by pushpins, crude but effective.
The thread is 100% linen, which I waxed with the little hexagonal block of beeswax you can see in the picture. I picked it up last summer at a farmer's market. Bookbinder's needles can be found a most stores which sell scrapbooking supplies or you can use darning needles and dull the tips. Dull tips keep you from further damaging the paper as you're sewing through it. Waxing the fibers not only make pulling the thread easier, the wax also helps seal the hole in the paper a bit as it's rubbed off, passing through the hole.
Once I had the signatures sewn to the three cords, I pulled it out of the frame and found two suitable boards a little larger on every side than my text block(the stacked and sewn signatures are referred to as the 'text block'). I lined up the cords and then drilled holes in the boards for them to pass through. Most binding was done with either pasteboard or oak boards. Pasteboards were/are a cheap and speedy alternative to woodworking and oak resists warping. I had neither oak nor pasteboard handy so I went with pine. (I might regret it someday but it's an experiment, so it doesn't matter that much to me, to be honest. Remember what I said about prototyping and beta testing my designs?) The pine was sanded, the edges beveled and the wood treated with a hardener.
This is a picture of the book halfway to completion. The text block has been sewn to the cords and the cords threaded through the holes drilled into the cover boards. Note that pegs have been hammered into the holes to tighten and secure the cords. This also has the effect of tightening the binding. Paleographers and Codicologists (scientists who study old writings and books, respectively) describe a book 'that resists opening' as being a good binding for our style and time period. That's what I'm going to be going for.The ends of the cords are trimmed and then dragged along the edge of a knife to fray them. The frayed ends are then splayed out along the board so as to avoid unsightly lumps beneath the leather that will eventually cover them. This means they are twice secured: once by the pegs and once by the paste sandwiching them between wood and leather. As you can see, I pasted mine down in advance to keep them out of the way until I got around to gluing leather over them.
The leather you can see lying beneath the nascent book in the picture above is the leather I chose. It's a buff leather chosen in keeping with the 'things I had lying around' theme. This used to be a poorly-assembled vest that some RV enthusiast had plastered with patches and stickers from their travels and then sent to Goodwill. I was happy to peel off the stickers, clean the leather and give it a good home in my project box. Now it's a book cover. Wouldn't that RV'er be surprised what happened to their old vest? I love recycling!
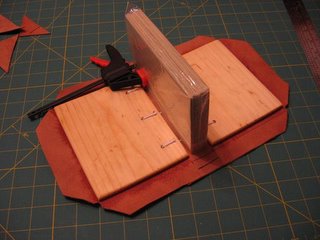
I cobbled together a press out of plywood and lag bolts to use in the gluing portion of the programme. It's based on an enlarged version of a flower press I saw for sale somewhere once upon a time. I figured it would be good for applying strong, gentle and even pressure across the surface of the entire book. The leather is applied only to the front and back using PVA adhesive (see below). I did not glue the spine or the edges, those will be dealt with in good time.
Some fudging is possible if you're going to use metal corners, but a bad fit is a bad fit and it will show, even with the corners on there. I've seen it, even if I wasn't binder enough myself to say what was wrong with the book in my hand, I knew it was wrong somehow.
Now its just a matter of glue, fold and press...
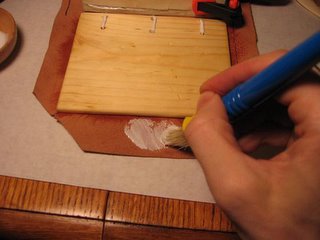
Always brush glue toward the edges. This alleviates the pooling in the middle effect that will give you a bad (read: "Lumpy") glue every time.
I use a combination of tacks, clamps and binder clips to hold the flaps down while I do the others. Be sure to tuck the leather under the bound edge of the book and clamp that area especially. That double-thickness at top & bottom of the spine add a lot to the stability of a book.
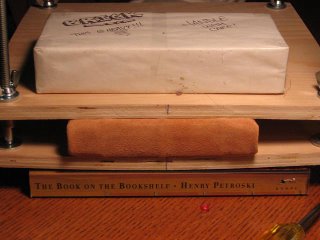
In the press. Since I'm doing this at the dining room table I decided to raise my ersatz bookpress up off the wood to keep from scratching things up. The title struck me as appropriate.
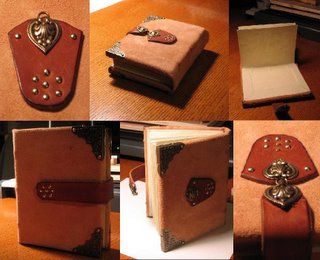
Below is a montage of pictures of the final product. You can click for a larger view if you're curious. I'm ecstatic with the way it turned out. The final will be made with heavier rag paper and nicer leather (A nice blood-red Moroccan strikes my fancy) and will have pewter or at least silver-colored accoutrements. In the meantime, I'm going to have fun scrawling poetry in my current one.
And now we return you back to doublet-making after a nice long walk down accoutrement lane to clear my head! Thanks for indulging me.
-Scott
So... my new garb needed a book. A Psalter to be exact.
So I dove into my extensive library and came out with Hand Bookbinding, A Manual of Instruction by Aldren Watson (Dover, 1986 ISBN# 048629157X). Yes I happened to have a manual of bookbinding on the shelf. I'm a rennie and a bibliophile. I also have a book that would allow me to replicate Nelson's Flagship to the last nail. I also came up with a copy of the Vulgate Latin Psalms I printed off a no-longer extant website a few years ago. Good to go.
Since this is my first book, I decided to bind it blank and make it a sort of journal, just to try my hand at the art and craft of bookbinding and be certain I could do it before I put any real effort into a latin psalter. I never do anything half-way, though, so I spent a bit of time tracking down some scrap leather as well as coming up with a clasp and corners to provide the right look I was going for.
For a few years I've been mulling over the idea of binding a book or two, so over all that time I've collected oddments I thought would be good for the future book I was planning. Sometimes it takes years before I've collected enough in my Venus Flytrap of an imagination to start work. Certainly that's the case here. The corners are box corners I found at a craft store on closeout last year. They're thin enough metal to manipulate a little to make them more suitable for a book. The clasp is a fairly standard La Mode clasp from the fabric store, and the leather strap is leftover from making my rapier hanger a few years ago.
Notes on Nomenclature
I know, I know. Usually I'm not a stickler for nomenclature. 9 out of 10 times this is out of laziness or a general distaste for having to use parenthetical asides to translate tech-talk into laymanspeke. That said, I've been assured that bookbinding simply won't work if you don't know how to talk the talk. I'm skeptical but I'm going to go along with it for now... just in case.
The book will be a small one, an "Octavo" it's called, meaning that the paper making up its pages have been folded in half twice so that - once they are cut - they make eight pages. The cuts were all done by running the back of a butter knife along a creased edge, giving the paper that ragged look which modern binders call the "deckle" which is just a fun word to say. If you do it right, you're left with individual rectangles creased down the center, which are stacked to look like a little pamphlet. The individual section is called a "bifolio" and together they form a "quire" or "signature". The signatures are stacked and sewn to a series of cords using something that looks a lot like a chain stitch. Some books also feature signatures sewn to one another with what looks like a buttonhole stitch.
I will be raiding my wife's supply of resume paper for paper of the correct weight and cotton-rag content. I'm working with 14 signatures of 4 bifolium each. I stacked them and drew a line down the spines of the signatures and then pricked them along the three lines as I will be doing a three-cord binding. The pricks in the paper will allow the sewing to take place without having to force my way through multiple layers of paper with each pass of the needle.
One of the things I found in the magpie stage of my bookbinding planning was a frame which - with some suitable modification - makes a smashing good sewing frame for the binding of books. Keeping the cords taut makes sewing to them much easier. (Yes, that link shows a slightly different method than I used here) The dowel along the top allows me to tighten the cords which are secured to the frame by pushpins, crude but effective.
The thread is 100% linen, which I waxed with the little hexagonal block of beeswax you can see in the picture. I picked it up last summer at a farmer's market. Bookbinder's needles can be found a most stores which sell scrapbooking supplies or you can use darning needles and dull the tips. Dull tips keep you from further damaging the paper as you're sewing through it. Waxing the fibers not only make pulling the thread easier, the wax also helps seal the hole in the paper a bit as it's rubbed off, passing through the hole.
Once I had the signatures sewn to the three cords, I pulled it out of the frame and found two suitable boards a little larger on every side than my text block(the stacked and sewn signatures are referred to as the 'text block'). I lined up the cords and then drilled holes in the boards for them to pass through. Most binding was done with either pasteboard or oak boards. Pasteboards were/are a cheap and speedy alternative to woodworking and oak resists warping. I had neither oak nor pasteboard handy so I went with pine. (I might regret it someday but it's an experiment, so it doesn't matter that much to me, to be honest. Remember what I said about prototyping and beta testing my designs?) The pine was sanded, the edges beveled and the wood treated with a hardener.
This is a picture of the book halfway to completion. The text block has been sewn to the cords and the cords threaded through the holes drilled into the cover boards. Note that pegs have been hammered into the holes to tighten and secure the cords. This also has the effect of tightening the binding. Paleographers and Codicologists (scientists who study old writings and books, respectively) describe a book 'that resists opening' as being a good binding for our style and time period. That's what I'm going to be going for.The ends of the cords are trimmed and then dragged along the edge of a knife to fray them. The frayed ends are then splayed out along the board so as to avoid unsightly lumps beneath the leather that will eventually cover them. This means they are twice secured: once by the pegs and once by the paste sandwiching them between wood and leather. As you can see, I pasted mine down in advance to keep them out of the way until I got around to gluing leather over them.
The leather you can see lying beneath the nascent book in the picture above is the leather I chose. It's a buff leather chosen in keeping with the 'things I had lying around' theme. This used to be a poorly-assembled vest that some RV enthusiast had plastered with patches and stickers from their travels and then sent to Goodwill. I was happy to peel off the stickers, clean the leather and give it a good home in my project box. Now it's a book cover. Wouldn't that RV'er be surprised what happened to their old vest? I love recycling!
I cobbled together a press out of plywood and lag bolts to use in the gluing portion of the programme. It's based on an enlarged version of a flower press I saw for sale somewhere once upon a time. I figured it would be good for applying strong, gentle and even pressure across the surface of the entire book. The leather is applied only to the front and back using PVA adhesive (see below). I did not glue the spine or the edges, those will be dealt with in good time.
PolyVinylAcetate (PVA)Once it's out of the press, the edges have to be mitered so they will meet cleanly on the insides of the covers once you're ready to glue them under. So the corners are lopped off at a 45 degree angle, the width of the cover boards away from the corners. That's important, that's why its in italics. You then need to cut divots from your mitered cut down to the actual corner of the book so you get a clean meet at the corners when you fold the flaps in. Like so.
PVA is what is known as an 'archival' adhesive. I keep it on-hand because it's very useful. Anytime someone uses the term 'archival' it means that it has a nuetral or near-neutral Ph and therefore won't accelerate the adverse effects of aging. One of the reasons old books are deteriorating in our libraries is because the paper and hides used to create them were acidic, as were the glues, inks, sizes, etcetera. The books literally are eating themselves. Animal and starch-based pastes that were used by period binders drew bugs and didn't help matters. I'm opting for a modern solution here, but if you want to be really authentic go here to learn about making wheat paste which IMHO is better (less smelly & substantially less annoying to make) than fish glue.
Some fudging is possible if you're going to use metal corners, but a bad fit is a bad fit and it will show, even with the corners on there. I've seen it, even if I wasn't binder enough myself to say what was wrong with the book in my hand, I knew it was wrong somehow.
Now its just a matter of glue, fold and press...
Always brush glue toward the edges. This alleviates the pooling in the middle effect that will give you a bad (read: "Lumpy") glue every time.
I use a combination of tacks, clamps and binder clips to hold the flaps down while I do the others. Be sure to tuck the leather under the bound edge of the book and clamp that area especially. That double-thickness at top & bottom of the spine add a lot to the stability of a book.
In the press. Since I'm doing this at the dining room table I decided to raise my ersatz bookpress up off the wood to keep from scratching things up. The title struck me as appropriate.
Below is a montage of pictures of the final product. You can click for a larger view if you're curious. I'm ecstatic with the way it turned out. The final will be made with heavier rag paper and nicer leather (A nice blood-red Moroccan strikes my fancy) and will have pewter or at least silver-colored accoutrements. In the meantime, I'm going to have fun scrawling poetry in my current one.
And now we return you back to doublet-making after a nice long walk down accoutrement lane to clear my head! Thanks for indulging me.
-Scott
03 November 2005
Tips for Sewing With Cats
TODAY'S TIP...
Cat's can't spit!
I know, that sounds odd as a sewing tip, but if you have a kitty I think you'll follow me on this one. About 5 1/2 years ago, my wife and I held a lovely little renaissance wedding at a park in Nebraska. We made our own outfits and also garbed our wedding party to boot. Lots of sewing into the wee hours of the morning was entailed in this project, most of it with a kitty on the floor nearby playing with fabric scraps or chasing the thread or whatever. One night a few weeks prior to the wedding, Kris was putting the finishing touches on her bodice when Figaro (pictured in an earlier post) jumped up on her lap and got hold of a piece of thread. Lickety split, he had it down his throat, as well as the sewing pin that it had caught on as it passed! His life was saved by timely medical intervention.
The hairs on the tongue of felis domesticus are pointed backward. That is to say they are aimed at pulling things more easily into the gullet. This is why a cat's tongue feels sandpapery when they lick you. It aids in grooming, and lets them do things like drink by curling their tongue backward, or strip the feathers off of birds (in the wild, I mean).
To wit: A cat that gets ahold of a piece of sewing thread is going to swallow it because they cant spit it out, even if they want to! The backward facing hairs work the thread down the throat even as they're trying to spit it out. If there is a needle on the end of that thread... well, you're either going to be $600+ poorer for the surgery necessary to remove it - assuming you get the cat to an emergency vet on time - or... well I think you know the other possible outcome.
Incidentally, this is not why Figaro is currently ailing. But the current events gave me the idea for this post. If you have cats, keep in mind that - as far as they are concerned - you are playing with string and shiny dangly things. Those are cat toys right? Wrong! Of course they aren't. But they can't discern the difference, so it is up to us to keep them safe.
Keep your cats away whenever you are doing handsewing or pinning. Even if you're using so-called safety pins. Our new kitten Dusty will stop at nothing to get at the safety pins Kristin uses to put her quilts together with (easier to quilt through several layers when they're safety-pinned together). It's easy to say 'they're safety pins, whats the harm?' but Dusty can pull those suckers out faster than you can say 'knife'. For cats, 'safety pin' is a misnomer.
Figaro nearly died that night, which would not have been an auspicious event for the weeks prior to our wedding! As it was it was bad enough. It wasn't Kristin's fault, the event was something of a fluke, but the vets told us they see similar injuries all the time. Sometimes they see the same cat more than once! I guess they don't teach 'Sewing With Cats' in home ec! Lock 'em in another room during these activities or keep them above where the cats can get to, and NEVER leave your pin cushion unattended with kittens around. Practice safe sewing habits and your garb project need never necessitate an appearance on "Animal ER".
02 November 2005
Accessories
Figaro has stabilized and we're waiting to see if the medicines they put him on helps. In the meantime, I'm trying to get back into the swing of the sewing-thing. To ease into it, tonight, I'm going to talk about accoutrements.
A lot of rennies run around with so many things hanging from around their waist you'd think they were peddlers! I'm not generally one of them. As Calabash I tended to carry a lot of toys around to entertain the kiddies with, but in my new role, that won't be necessary.
In the Moroni painting I'm going by, the Duke is wearing a rapier on a fairly standard sword hanger for the time period. Because of the angle of the sword as he is holding it, I have to assume it's a two-strap holder in order to allow that kind of play. Either that or Moroni fudged it a little for artistic reasons. His is black leather, but I'm a freak and don't particularly go for the whole black leather thing. That's what everyone else does. I like autumnal earth tones in general and I take my leather accoutrements brown when I can find them.
For the beta costume I will be wearing slightly more on my belt than the gent in the painting, largely because I need to carry more items with me since it's sometimes a long walk back to the pavilion for needed gear or props and I have to have myriad ID and keys on me that have to be hidden. Such is life in the art of melding the 16th and 21st centuries.
I made my sword belt out of a nice heavy brown latigo leather I bought at scrap prices from MacPhereson Leather in Seattle's International District. I also found most of the findings there. I had to fudge things a little because I was still living in an apartment at the time and didn't have access to the kind of metalworking paraphernalia I now have.
The metal bracket that secures the hanger to the sword belt is actually 1/2 of a hinge with a D-ring and hook worked into it, which I think you can see in the picture below. This was easy to fabricate with the limited access to tools I was dealing with. I've an affection for nickel finishes rather than the brass everyone else seems to use with the few brown leather items available out there.
The design worked into the leather is recycled from a 15th century tile design found in a cathedral. It's a fairly typical medieval cruciform design. I'm terrible at keeping track of those things,I'm afraid. I'm sure I found it in one of the myriad Dover books I used to sell back when I ran a bookstore - which was around the time I made this rapier hanger. I'll try to locate it if anyone is really interested.
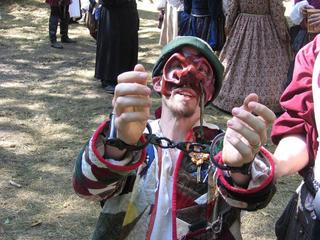
Because the character I will be playing will be essentially lower middle class (the sheriff) A few other items of note will be my keys (above) and manacles (not pictured). The key shown in the picture is generally referred to as "The Cathedral Key" because it serves the dual purpose of bottle opener! The barrel of the key even bears a the motto "IN VINO VERITAS" (In wine is truth). Of all the silly things I've carted around on my belt over the years, this has probably been the most useful.
Also rans include my mug and mug strap, which I made on my own design (shown below) and a belt pouch that I patterned after my sporran, only much smaller. It's just the right size to conceal my ID, camera and money securely against my person in such a way as to deter cutpurses. Also I carry leather fencing gloves when a fight gig is in the offing or if it's a cold Washington morning. Most of the time those won't be around. Also I tend to carry a stag-handled eating knife I picked up at a Thrift store back in the day for about five bucks (score!) rather than a dagger.
I am well aware that the mug on a strap on your belt is a favorite pet peeve of the non-faire reenactment community. However, as guildmaster for the Villagers at my faire, I find it my responsibility to present the image of how I want my villagers to act, and my A#1 goal for the villagers is to keep them hydrated!!!
It's darn hot out there and we're doing a lot of very active bits and gigs. Water is essential and running back to the encampment to get your mug isn't always an option. We've had people go down to heat exhaustion in the past and I've made it my mission to keep that from happening again! Hence our belt-hanging tankards being non-negotiable. If all-else fails keep in mind that our guild patron is Saint Brigid, who is (among other things) a patron of beer and brewers! How best to pay homage to our namesake?
The Ghost of Accessories Yet-To-Come
For the final costume, I will be making a new sword hanger with more period-correct metal findings, though whether I will be purchasing those or fabricating them remains to be seen. The leather will still be brown, and I'll be making a new purse and perhaps an en-suite parrying dagger or stilletto will be in the offing depending on time and energy levels when the time comes. Shoes for the final noble outfit wouldn't be out of the question either.
31 October 2005
Pause
My cat, Figaro, is very ill and has lost a lot of blood for reasons as yet unknown.
I might be gone for a few days while I... God I don't know.
-Scott
I might be gone for a few days while I... God I don't know.
-Scott
30 October 2005
Site Recognition and such like...
I found out tonight I'm listed on Festive Attyre (along with scores of other costume diaries) but the really great bit was when I realized my friend Guy finally updated his site to include his new leather Ramirez-inspired 'hunting costume'. Guy's a great... um... guy (sorry) and I am always happy to see him at fair. It annoys me that he lives down the coast a piece, so we only see one another at faire because there are so few fellows out there who can (or will) talk costuming with you.
Anyway, it's great garb, I've seen it and I highly recommend his site. He also did a great red silk Sir Walter Raliegh sort of court garb that has won a boatload of prizes.
There aren't enough male costumers out there, we have to stick together!
Anyway, it's great garb, I've seen it and I highly recommend his site. He also did a great red silk Sir Walter Raliegh sort of court garb that has won a boatload of prizes.
There aren't enough male costumers out there, we have to stick together!
26 October 2005
Past projects...
Update:
At the moment I am working on some rather tedious handsewing which adds insult to injury by also being visually uninspiring. To wit: there's not much to talk about on the current project except that it proceeds apace. I should have the sleevelets all sewn up by the end of the day tomorrow (I had a lot of handsewing to do on the lining for them before I could finally sew them on) and then it's on to the buttons and buttonholes! Which should be more visually enlightening and require me to post some more photos...
In the meantime:
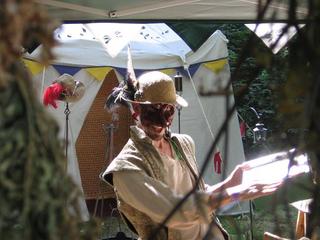
I thought you might be amused to see what else I get up to (costumewise) at the Washington Renaissance Fantasy Faire in Gig Harbor Washington this past season. Our guild is the village guild and I have assumed the role of guildmaster for the coming year, but in past years I was the masked fool Calabash.
Enjoy!
I'm told this one looks a little sinister. Honest, that's
the guild songbook I'm holding and I'm singing.
I'm not plotting to overthrow the crown... honest!
The jerkin I'm wearing has been 'aged'. I made it from a jaquard
upholstery material and then beat it to heck with various
abrasives, including steel wool, wire brushes, sand paper
and then actual stones! Then I buried it for a couple
of days in the garden and dug it back up.
Now it's perfect!
Egad! Someone caught me without my mask on!
Lucky thing the camera didn't break!
I have a LOT of crap hanging from my belt in this picture!
Lucky thing the camera didn't break!
I have a LOT of crap hanging from my belt in this picture!
Free Calabash! Free Calabash! Free Calabash for everyone!
Every morning I led the Queen's procession in chains and spent
the whole time running away and trying to convince patrons to
pick the lock while the Queen's Guards chase after me
and haul me back into line. It's a lot more fun than just
shouting 'Here comes the Queen, get out of the way!'
The quilted coat is the work of my beloved wife and is one of my
most prized pieces of garb. It's the length of a frock coat and swirls
nicely when I spin around, or roll down a hill,
or get tossed around by the guards or... or...
Why are the ale wenches always picking on me?
Seriously, I discovered that the mask scared small children.
Or it used to until I started hanging the braided green ribbons
out of one nostril. Now kids think Calabash is the coolest!
Face it, even Darth Vader wouldn't have been intimidating if he'd had a sniffle.
"LUKE! I am you (sniff, sniff, SNORT) your father!"
Incidentally, the burgundy doublet I'm wearing in
these shots was the one I made for when I was
Captain of the Queen's Guard. (The 'Scots Guard' we
protected the throne... or at least the cushions...) I'll try
to find some better shots of it. It was my first 'serious'
attempt at a doublet.
24 October 2005
Quilted Pucker...
This post had another title but I decided not to go there...
I have consulted numerous experts and decided to live with the wierd collar thing. Denise Helm, who is a gifted seamstress and a Regency Costumer who will soon be offering her own patterns for costumers of that period, pointed out "Depending on what extant doublets you are looking at ... the owner might really have had the same drag lines, or it could just be hard to tell with the quilting if the collar is separate or not. I know by looking at Victorian photographs, some of the strange lumpiness and bulges are what women really looked like - if they couldn't eliminate it then it explains why I can't now!"
She also beat me soundly about the head and shoulders with a sewing machine for cutting real cloth without at least two hundred muslin mockups under my belt.
Yes, well, this is the tip of the day for newbies... even experienced sewers can get too big for their... um, doublets. So anyway, my wife and Denise actually agree that the thing to do (and it is incidentally a period thing to do) is make the collar separate, including the chevron shape at the back and then ease it in, which will allow me to compensate for any dragging as it occurs.
So next post will be about fastening solutions...
20 October 2005
A teeny tiny snippet of art history
It occurs to me that I've neglected to fully explain where this design came from other than to mention that I 'noodled with it', that the subject wasn't really Venetian and that someone named Moroni painted it. If you're familiar with the painting, feel free to skip this post. If not, well, the noodling was all me, but the painting itself was executed by the mannerist painter Giovanni Batista Moroni around 1560. Allegedly the subject is the Duke of Albuqurque (as I said, not a Venetian) but Moroni, was Venetian.
I've always liked this painting, if for no other reason than the man looks so earnest and postively normal rather than like some religious icon in a dogma where nobility is worshipped as was so often the case in renaissane portraiture. If you click on the duke's name, it will take you to the "Art Unframed" site, where you can view hundreds of famous historical paintings and even have a copy made of the one that you fancy. I've never used their services beyond browsing, but the idea intrigues me as I've never developed the brushwork discipline necessary to paint in the mannerist style in order to copy the painting myself.
Great panes...
Disclaimer... If I dug though my old text books from art school I could probably come up with a better name for this feature than 'sleevelet'. But the books aren't in a convenient place at the moment, and I'm too lazy. Not to mention that in the big picture, nomenclature doesn't seem all that important at the moment. If anyone has a 'proper' term for it at their fingertips they can email it to me, but in the meantime I'm going to stick with 'paned sleevelet'
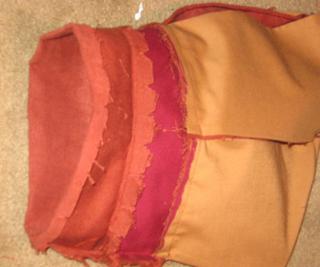
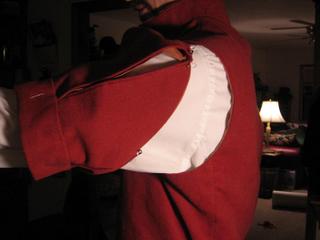
I finished the rows of straight chain stitches on the panes and I've assembled the sleevelets. Below is a pic of the cuff with the panes sewn into it before I turned it and tacked it down. The cuff piece has a arch to it, which is why I clipped the edges prior to turning as you can see.
The dark burgandy layer is the canvas I used to interline the pieces. Yes, I know, I said something heartfelt in a previous post about interfacing being easier than interlining. Keep in mind the other things I said about only using modern conveniences where I can get away with it. In this case I think that modern interfacing would make the lines too stiff and starched-looking. Since an interlining is essentially only attached where the stitches hold it, it can give pieces like the panes and cuff of my sleevelet structure without forcing them to hold thier shape to an almost starched extent.
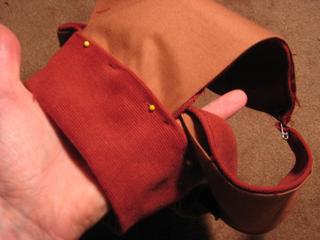
Trimmed and turned. At the moment it's just pinned together to check the shape and see if adjustments need to be made before there are too many seams to pull.
This is the scrye where it will eventually be joined to the body of the doublet.
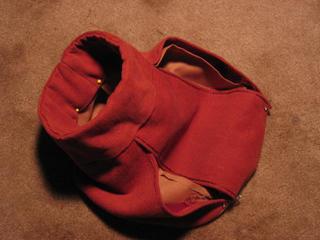
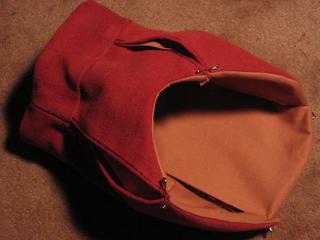
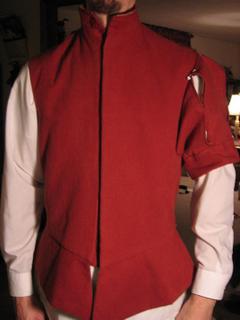
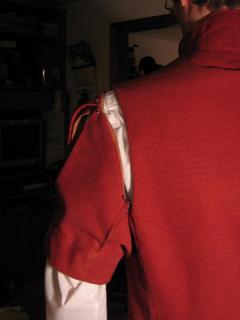
Since I've never made a sleeve treatment such as this one, I thought it meet that I should pin and pose, trying out the thing and making 99.9% sure I got it right before I actually sewed it on. The sleeves of the doublet will be laced on, because I prefer that method overall, but in the Moroni painting the jerkin I am copying looks like it's been sewn into the armscrye. This is unusual according to most of my reading, but the painting shows no visible signs of lacing or points holding the sleevelets in place, so neither will this jerkin - or the final one.
Note: I didn't have one of my usual 'renaissance shirts' handy, so I'm wearing a white dress shirt in these photos. It doesn't really matter because at this point I'm just testing the angle. The 'bulky armpit' tests will come later when it's tacked on a little more securely and I can get a real feel for how it will go. The nice thing about panes is that they can be moved to expand or contract around as much or as little thickness of fabric as I am likely to find going through that armhole anytime soon.
At Extension
Front
Shoulder back
Shoulder profile
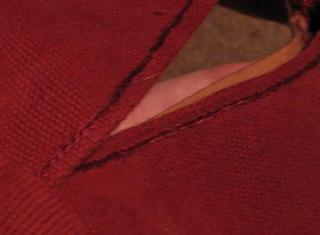
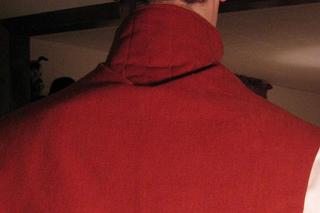
I'm pleased so far with the similarities with the jerkin in the painting. There is a small issue at the back of the neck, however. It is possible that partially quilting might not work in the long-run. The point where the quilting stops has a pucker that just won't go away. I'm still looking for solutions to this (other than quilting the whole damn thing, of course). Maybe some of that cheap ultra-flexible boning they sell at fabric stores or some broom straw or something... I'm sure I'll figure it out eventually.
No matter how many times you've done this, the course of sewing garb never runs completely smooth.