Pages

09 September 2012

The Last Apple: In Memory of Gaffer Applewright

When I first started faire, the first thing I read wasn't a history or costuming book. It was a 'Meet & Greet' primer written by someone who called himself Gaffer Applewright.

He had six basic premises that have been my guiding light in the years since:
1. Notice the Patrons.
2. Be Helpful.
3. Be Friendly.
4. Be Your Character.
5. Speak the Speech.
6. The attitude sells it.

It would be six years before I had a chance to meet the man and let him know how much he'd helped me without ever meeting me. He was kind and humble, and told me that if I had found something in his words, then it was in me to begin with.

A more generous actor I cannot imagine working with.

Roger Russell, known far and wide as Gaffer Applewright, died this weekend.  I only knew him through the faire. His trademark 'apple trick' (a story he tells as he cuts an apple in a way that makes it come apart like a puzzle) was the perfect, irresistible bit to break down the barrier between the actor and the patron. Like many others, I have long sought to emulate the effortless way that he interacted, the completeness of his characterization.

He was everything I expected from reading his meet & greet paper, a fascinating man with a wise and gimlet eye, a quick wit and a penetrating mind. So it was that I felt greatly honored and somewhat taken aback when one of my companions pointed to him the day I met him and said "that's going to be you in thirty-odd years!"

I can only hope so.

After his speech we had some time to discuss the politics and oddities of renaissance culture, from the search for a cure for scurvy to the nuance of Elizabeth's reign. It was the pinnacle of my time at faire that year and one of the great highlights of my years of doing this thing we call ren faire.

Rest in peace, Gaffer. You will be missed.

07 September 2012

From Mayor to Artisan: Costuming the Working Man

As you know, my recent efforts in the realm of costuming has been on the side of the upper middle class and lower noble caste.  But now that I've spent the summer shaking babies and kissing hands, it is time to launch my new project: The School of the Renaissance Artisan and that means new clothes.

Like a renaissance Springsteen, I return to my blue collar roots.

I really should stop saying things like that. No one can live up to expectations like that. Nevertheless, baby I was born to run...

Ahem.

To be completely honest: For this project I won't be wearing a costume the whole time. Only when I think it will change the outcome, or if images need to be made of the process or when it won't unnecessarily impede my progress through a public space.

There's a lot of research to be done; there's no reason to wear galligaskins to the library.

This woodcut is the inspiration for the workingman's outfit I am about to make.


An English chap of the mid 1560's stands against a tree, a working stiff of some sort, tools arrayed in a pile at his feet. I've heard him called a surveyor because of the dividers in the foreground, but  I'm not so sure. There's also a pick axe, handsaw, and claw hammer. Not to mention the apron the man's wearing, which makes more sense for a carpenter or something than for a surveyor.

I like the elegant simplicity of it. I read this as galligaskins (probably of wool), plus a doublet and jerkin. Worn with a vestigial ruff at the collar, probably attached to the shirt collar. Made in appropriate fabrics and with the correct accouterments, it should pass unnoticed in any tavern, field, or guildhall of the 16th century.

It's perfect for my needs.

The first version I plan to make will be grey wool bottoms and white fustian or wool top. A simple color scheme that works well and adheres well to what we know from the research being done into English wills of the period by Ninya Mikhaila and Jane Malcolm-Davies. According to their research into the wills of the county Essex, 40% of doublets mentioned were leather,  24% linen canvas, and 21% fustian. I might make another leather doublet at some point but at the moment, I'm a bit leathered out. So fustian it is!

Clockwise from the upper left, in our fabric stash I found a nice grey wool, a heavy unbleached fustian canvas, a lighter white fustian, and a pale green linen tablecloth to use as a lining.

Yes, a table cloth. Why not?  It will make a nice lining for the Gascon hose.

More tomorrow.


06 September 2012

The School of the Renaissance Artisan

Welcome! It's high time I clued you folks in on where I've been and what I have been up to during my recent silence.  

You might have noticed a new tab appear at the top of the blog that says 'Schole of the Renaissance Artisan'. This is a new project that I've undertaken to 

You can read the full story here.


The gist is this: I want to look in-depth at what it really mean to be an actual 'renaissance man'. Not a Davinci or a Michelangelo, but a 'Bill, the man who fixes the roof when it rains' or a 'Jack, the guy that bakes the bread at the market'. Because I think we forget that the renaissance wasn't just artists and soldiers and kings and popes, but a groundswell of normal, ordinary people advancing their lot generation by generation, building themselves up through the sweat of their own brows and the callouses of their own hands and, for better or worse, creating the modern world.

For one year (January - December 2013), I'm going to delve into each of the 54 livery companies that had royal charters in 16th century England.  

This will be a multi-media enterprise, including a YouTube channel called The Rest of the Renaissance and possibly tapping into other venues for sharing information as well with the hope of eventually turning it all into a book. Possibly even a hypertext eBook with embedded links to the videos and other interactive materials.


I'm planning to bring you along as I learn some new skills and hopefully we're all going to learn something. As I go I will share with you the resources I'm using, building a sort of virtual library of 16th century source material and related sundry for anyone else who wants to acquire these skills. 


If nothing else, I invite you to watch me fail in a spectacular and possibly amusing manner.
A few of these projects will overlap or build one upon the other. Some I already know how to do. Some might be a bit hard to manage. There’s a grocer’s guild; not sure how that’s going to work. And a goldsmith’s company, a voice that sounds suspiciously like my wife’s whispers in my head.  Have you seen the price of gold lately?


I’ll figure it out. I know people. And those people know people. People with skills that deserve to be appreciated and trumpeted.  People keeping alive crafts and skills that would die out completely were it not for them. And if by failing miserably at my attempts to learn these crafts brings attention to their superior craftsmanship, so much the better.


So I invite you to please join me here as I take you with me back to school in a possibly impossible attempt to become a renaissance man. 


Between now and the new year, Garb for Guys, along with the new blog I set up for the project
http://renaissanceartisan.blogspot.com/ will track my preparations, including the costuming. Then, on January 2nd (give me a day to sleep in from New Year's Eve, won't you?) the bell will ring and school will be in session.

Join me, won't you?


21 August 2012

09 August 2012

Leather Jerkin: Taking It Out for a Spin

In a Washington summer, when you look out your door and see this, you know that your day is going to end in a hot and sweaty place. By the end of Saturday, I believe it was 95 down by Lake Union, and according to thermometers on the faire site were hitting 105.

Fear the morning fog.
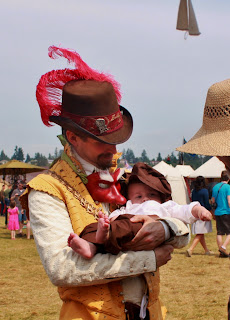
The local wildlife loves their Lord Mayor!

For the record, I want to take this opportunity to officially deny that I use illegal Parrot Labor in the creation of any of my costumes. It never happened. I wasn't there. You haven't seen me.


Garb in action: The demands of a high-pressure task like being a music stand on a sunny day are easily met by my leather jerkin.  ACTION GARB!!!

Oppressing villagers is taxing work. It's a good thing I have my Action Garb to wear!

I WILL OPPRESS ALL THE VILLAGERS!

If you can't invest in infrastructure because you pillaged the road-building 
fund, the least you can do is invest in a few signs...

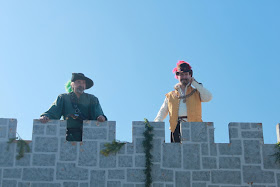
With these people behind me, how can I not attain a dukedom?

Honestly. It was a million degrees out there and I managed to keep doublet and jerkin on almost all day.

More later after I've recovered... in a week or two.

03 August 2012

Apropos of nothing...

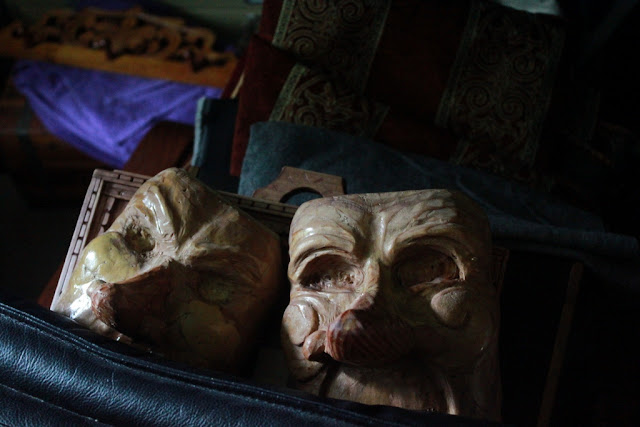
The mask has chosen a new host. 
(Not Photoshopped, just a very patient kitty cat.)


01 August 2012

Get thee to faire!

There are exciting things afoot! I have a new project cooking which will debut in earnest as soon as I've finished being a disreputable politician (because none of us have enough of those in our lives) as the Lord Mayor of Merrywick at the Washington Midsummer Renaissance Faire!

The first three weekends of August in Bonney Lake, Washington.
http://www.washingtonfaire.com/

Won't you come out and play with us?


30 July 2012

A mask display for your wall

Because I make masks and have been a masked player for so long, I get asked a lot about how to display a collection. Flatter masks such as Moretta and Bauta are easy; just hang them from a nail. But the long-nosed masks of the plague doctor and Pantalone, or most any of the decent zanni masks are especially vexing because the long noses make them tilt forward until it's always looking up at you. I prefer to see them displayed as they would sit on the face of a wearer.

There are commercial mask displays out there and some very fun glass and wooden heads you can tie them to just as you would your own head. But unless you have more space than I do, that won't display more than a couple of masks at a time. So we look to the walls.


To be honest, most of my masks live in boxes where they won't get dusty. But when I display them, this is how I do it. This is also the type of hanger I make for clients for a nominal add-on fee if they request a display for the mask I'm making for them.


They're easy enough to make for yourself, however, and I'm not really out anything if you decide to do so.

The design is a simple T shape: a block cut the width of the mask out of wood and a nose-shaped piece doweled in the center. I like to spraypaint them black or white because they don't compete with the mask.

On the back I secure a loop hanger at the top and a large sawtooth hanger near the bottom.  The loop is to hang from the nail and the sawtooth is to secure the mask to the display as shown below.
The mask is placed on the display and the ribbons fed through the sawtooth hanger as shown.  The teeth on the hanger keep most ribbons from sliding back out. If I use a silk ribbon or something more delicate I use just a piece of metal arranged the same way to keep from snagging the fabric.
My local hardware store carries a variety of nice hooks that push easily into Sheetrock or plaster and do not detract from the mask.


This display supports even nose-heavy pieces and keeps them aligned however you wish.  Tie a nice bow in the dangling ribbons and you have a nice mask, well displayed.

Tip: For the lightweight plaster Carnivale masks that have been so popular recently, you can do essentially the same thing with foam-core or heavy cardboard. Paint it black and no one will ever notice what it's made out of.

26 July 2012

Leather Jerkin: Finishing up the detail work

Washington Midsummer's Renaissance Faire starts next weekend, and there I will debut the leather jerkin in its entirety. But here are a few teaser shots as I polish off the details.

I forgot to mention in my buttonhole tutorial that buttonhole stitches perform one other function that we're generally unaware of because so much modern clothes are lightweight fabrics: Buttonhole stitches make it easier for the button to pass through. Never is that more apparent than when working with leather. Trust me.

After trying a number of ideas and getting so far as to have to cut stitches on one of them, the epaulets I finally settled on are quite a bit different from those I envisioned.

24 July 2012

22 July 2012

Leather mask making: Sculpting with reluctant media


Real woodcarvers wear pink. (ahem)

The trouble with being on the road so much recently is that you can't take things like masks and wood with you. On the road, it's handsewing; at home, it's all about the carpentry. So I've been clearing a backlog of masks that I promised to folk, which means a lot of carving and a boatload of forcing leather to do things it doesn't want to do.

This is why I often call myself a sculptor of reluctant media. Between the wood and the leather, my hands are full just discovering the way they want to go and then trying to get them to go there.

This is starting to look like a leatherworking blog rather than a broad-scale costuming blog and for that I apologise to anyone who doesn't want me to dwell on wood and leather and would like to see a bit more cloth. I'll get back to cloth soon. I promise. In the meantime, here's some more leather mask making.

If you are new or looking for instructions on how to make commedia dell arte masks, or just leather masks in general, you will find a tutorial here that gives you the basics of the craft. Yes, the craft. The art of the thing is up to you to bring to the table.

Try as I might, there's only so much of this that can be taught in a blog format.


I mentioned the horn mallet in passing in my demo on the tiny mask. They're kind of a pain
to make, but no one sells them, so make them you must if you want one. "Drill hole, epoxy
handle into place" is a deceptively simple set of instructions. A lot of fussing and cussing is
involved. Most of the other tools used to do this thing can be purchased anywhere that clay
tools are sold. Assuming you don't want to make those too.


The horn mallet not only helps shape it by forcing it down into the grooves and valleys of the matrix, it also compresses the leather, stiffening the mask. The dimples can be smoothed out or left as a texture. I like leaving the dimples around the periphery of the mask and sometimes in the valleys. Texture helps those areas recede visually. (Domino-style minimum coverage zanni mask, commissioned.)


These masks are notoriously difficult to photograph. Note how the dimpled texture helps define the high points from the low. Combined with the shading provided by an careful application of the dye, the mask takes on additional dimension and character. The nose seam on this one was a bit of pain. (Domino-style minimum coverage zanni mask, commissioned.)


I just love this color. The challenge here was making a mask that was non-threatening and cheerful. Most zanni masks tend to look a bit maniacal under the best of conditions by design. Raised brows and wide-open eyes are part of the recipe. I also borrowed the Arlechinno spiral cheeks (which I'm told was historically meant to indicate a handlebar mustache -- automatically awesome).


The trick to pulling off a large full-coverage nose like this one is the inevitable seam where your leather wraps around the nose. I've heard it described in a dozen places, but really this is one of those things that you have to figure out for yourself. This is where craftsmanship is king.


Mask matrices can be re-crafted a couple of times. For a one-off commissioned piece, I'll use the matrix in its original form only that one time. This one has had the nose shortened and re-positioned and cherubic cheeks added using wood putty. Recycling is good.


When I retire mask matrices as I have these two, I usually put a hanger on the back and hang them up on the wall, which is the fate that these two are currently awaiting. 

26 May 2012

Making Leather Commedia Dell Arte mask - Tutorial and Demo

In case you ever wonder about why I take so long to complete some of these projects, I'm always working on something, even if I'm not blogging about it. I've been working on commissioned masks in the commedia style.  I'm not going to turn this into a maskmaking blog, but I did a tutorial series awhile back on making a miniature version of my favorite mask.

Maskmaker, Maskmaker, Make Me a Mask

Part One: Planning & Carving
Part Two: Carving & Completing the Matrix
Part Three: Prepping the Leather (Skivving Tutorial)
Part Four: Molding the Mask (Wetforming Leather)
Part Five: Finishing the mask

Now if you will please excuse me, I've miles to go before I sleep...


19 May 2012

Leather Jerkin: The torso is done

The body of the doublet is essentially done. I have one collar bit to finish and that's it. Now I start on a sleeve treatment and settle on which of the two options I've been toying with for the waist and shoulders.

My favored option is to go with the shoulder and waist treatments on the Museum of London jerkin. Especially after finding this delightful child wearing a similar jerkin at left. I like the fall of the squared-off wings and the waist treatment suits me well, I think.

In the meantime, I have completed the body of the doublet both in sewing and pinking. All that remains is attaching the shoulder and waist treatments and then tacking in the silk lining.

Please excuse the blue jeans. I was so excited to be almost done, I threw it on and ran outside with my lovely and patient photographer to catch a few shots in the sunshine...


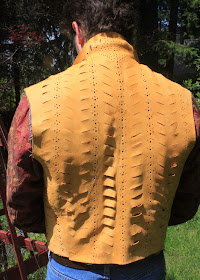
Still not entirely convinced that the pinking necessarily makes the leather more pliable as Janet Arnold proposed. Maybe I didn't make enough pinks, but I'm not certain I could pack them in any closer without making the leather unable to hold itself together. But does look cool and what more can one ask?  It also occurs to me that on a hot day, there are worse places to have additional ventilation...

I will add eyelets at the base when I do the skirting to accomodate lacing/pointing on occasion when I 
wear it without a doublet beneath.

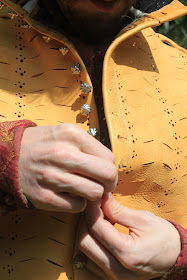
Buttons are attached to a thong running up the inside of the doublet, pushed through and laced to the 
shank at approximately 1.25" intervals. This attachment is used on the Museum of London doublet, as 
recorded by Janet Arnold.

The buttons are a pewter reproduction set that I bought on the internet years ago from Tudor Shoppe. 
They are no longer available in this motif. At the time, that was the only place I could find them, but 
since then, there have been many more places popping up that sell repro buttons, including the ladies 
at Tudor Tailor who have an excellent selection. The next ones I buy will be from them if I don't just 
buy some actual 16th century buttons off Ebay and clone them myself.

A better shot of the buttons and button holes.


13 May 2012

Leather Jerkin: Pinking & Slashing

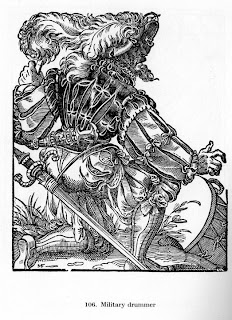
Our German friend to the left there is probably responsible for the fashion for slashing and cutting panes into garments in the 16th century.  Costume historians tell us that the flamboyant outfits of the German Landsknecht originated in the tattered garments of the battlefield and the booty. Very quickly, those slashed and draped fabrics became quite stylized as you can see from our fashionable friend, illustrated by Jost Ammon.

The fashion reached its high point in flamboyancy in the late 15th and early 16th centuries, as Teutonic mercenary legions carried their taste for stylish rags across the continent.  By the late 16th century, which is my preferred period for costuming, things had died back quite a bit and the pinks and slashes tended to be smaller, but made up for it in volume.

The leather jerkin I am making is not an exact replica of a painting or extent garment. Though it is inspired by the one at the Museum of London that first inspired me to imagine I might want to wear a leather vest in the August heat.  That garment is pinked with shaped punches to form a Lucky Charm cornucopia of hearts, stars, and diamonds. It's quite a whimsical garment, and if memory serves, Janet Arnold opined that it was meant for a child, a page in Queen Elizabeth's retinue.

Garb Carpenter

I don't have any punches with whimsical shape, nor do I have the time or inclination to make some. For those interested, I am told that Tandy leathercraft now sells punches in the shapes you would need for making the Museum of London jerkin.  Instead, I will be using assorted sizes of round punch and a nice sharp set of cheap bench chisels that I wouldn't want to use for woodworking, but are ideal for cutting leather.

If you want to do this at an event, the chisels used in the 16th century for this are pictured in Queen Elizabeth's Wardrobe Unlocked and a replica set in the back of The Tudor Tailor. I would link to someone currently making them, but I can't find anyone and all the leads I get take me to sites for blacksmiths who are no longer in business.  Apparently not much demand for these things.

The chisels I'm using came in a cheap set that I picked up from Harbor Freight. They're not what I'd choose to use for a woodworking project; they're okay steel but not great.  They do, however, hold an edge well enough to cut leather if you take care of them and keep them sharp.

If your chisels aren't sharp and you don't know how to sharpen them, take the time to learn to do it properly. You will be glad you did.
FAIR WARNING: Do not use a steel tool on damp leather. Make sure both are dry or the iron in the chisel will stain the leather black. Ever wonder why black leather was so prevalent for so much of history? That's why. Put it in an iron-oxide bath and your leather will be black before you know it.  This is why leather stamps tend to be coated or made out of stainless steel.
There's not a lot to say about this, so here are some pictures...


There's not a lot to say about this process other than to show you some pictures.


This picture gives a good idea of the size of the slashes. Also dispels any notion you might have that I'm a manicure sort of guy...
After examining as much as I could of some period ones, I didn't want it to look too precise. I marked the larger holes 3/4 inch apart, and marked one edge of each slash, one inch apart, then free-handed the rest of the holes and the angle of each chevron. So there's a bit of variation in each.

I decided to eyeball the chevrons to keep things from looking too staid and mechanical.

A decent set of hole punches is worth its weight in gold when you're doing this.

This is the back of the jerkin, almost done.
On the youth's jerkin at the Museum of London, Janet Arnold opined that the diamonds of holes at the back of the neck were intended to increase the pliability of the leather.  It certainly does that, but not so much that I'm inclined to think she was right. There are easier and better ways to make thick leather bend where you want it to, mostly by thinning it, which is considerably less work that this was. Honestly, I think it was decorative and the pliability thing was a nice bonus.

It is pretty, though...