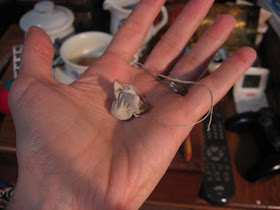
There are three methods of making your own period buttons that I am going to discuss.
- Soft Buttons made from fabric scraps
- Thread-covered buttons with a wooden core
- Buttons fashioned from beads
Of all the buttons I've experimented with, this is by far the easiest to master and the quickest to make. All it takes is a little practice (which is a lie, I fooled around with this for quite awhile before I consistently got spheres) some basic stitches and scraps of your "fashion" fabric!
Please note: There are many places to learn to do this. Tudor Tailor has some instructions, as does the fantastic Renaissance Tailor website. Both are illustrated and both contributed in some fashion to me learning how to do this prior to posting this tutorial here. I'm putting this up not because it's never been done elsewhere, but because no one I've found has done this with actual step-by-step photos and even though illustrations are helpful, I've always found it more comforting undertaking something new to see it laid out in actual pictures. Keep in mind that I'm a trained illustrator when you read that. So here we go...
One
If you're using a light fabric such as the linen I used on this doublet or even a light woolen, cut the fabric into squares approximately one inch wide. The Tudor Tailor advises using the bottom of a thread spool as a guide, but considering that there no longer seems to be a standard size for this, I came up with the dimension of one inch as making a finished size and firmness that I'm happy with.

NOTE: when using a heavier fabric, such as canvas or even a wool flannel for this, you might want to nip off the edges and make a circle as shown below or it'll be too bulky later when the time comes to stuff it.

Two
Using a piece of thread roughly a foot long (you want a little extra) run a circle of stitches around the center of the square as shown above. Keep the stitches as even as possible and keep in mind that you're going to be using these to gather the fabric into a ball, so don't make them too tight or they'll do you little good when the time comes.

ThreeDraw up the gathering stitches until the square looks like a little bag. Don't pull it tight, though until you...
 Four
Four...stuff the corners and edges inside. Then draw it as tight as you can without tearing or distorting the fabric. (I imagine great care would be needed if working with silk) Take the remaining tail of thread and sew some stay stitches into the resulting ball to keep it in a ball shape.

Five
Working from the bottom (the wrinkly bit) sew back and forth across the axis of the ball three times, leaving the stitches loose, forming a loop which will be used to secure the button to your garment. Gather the three into a single strand and go over them using a button hole stitch as shown below.
 Six
SixRepeat as often as necessary and sew them on...


Thankyou for your step by step photos :-)
ReplyDeleteOnly too happy I could help!
ReplyDeleteI love your blog, by the way. Especially the paleography sections. You have a lovely hand and obviously work very hard at it. Kudos!
Thankyou!!
ReplyDeleteAdding in Button Making Part 2 to my Button Post - hope that's cool