Showing posts with label Leatherworking. Show all posts

26 July 2012

Leather Jerkin: Finishing up the detail work

Washington Midsummer's Renaissance Faire starts next weekend, and there I will debut the leather jerkin in its entirety. But here are a few teaser shots as I polish off the details.

I forgot to mention in my buttonhole tutorial that buttonhole stitches perform one other function that we're generally unaware of because so much modern clothes are lightweight fabrics: Buttonhole stitches make it easier for the button to pass through. Never is that more apparent than when working with leather. Trust me.

After trying a number of ideas and getting so far as to have to cut stitches on one of them, the epaulets I finally settled on are quite a bit different from those I envisioned.

22 July 2012

Leather mask making: Sculpting with reluctant media


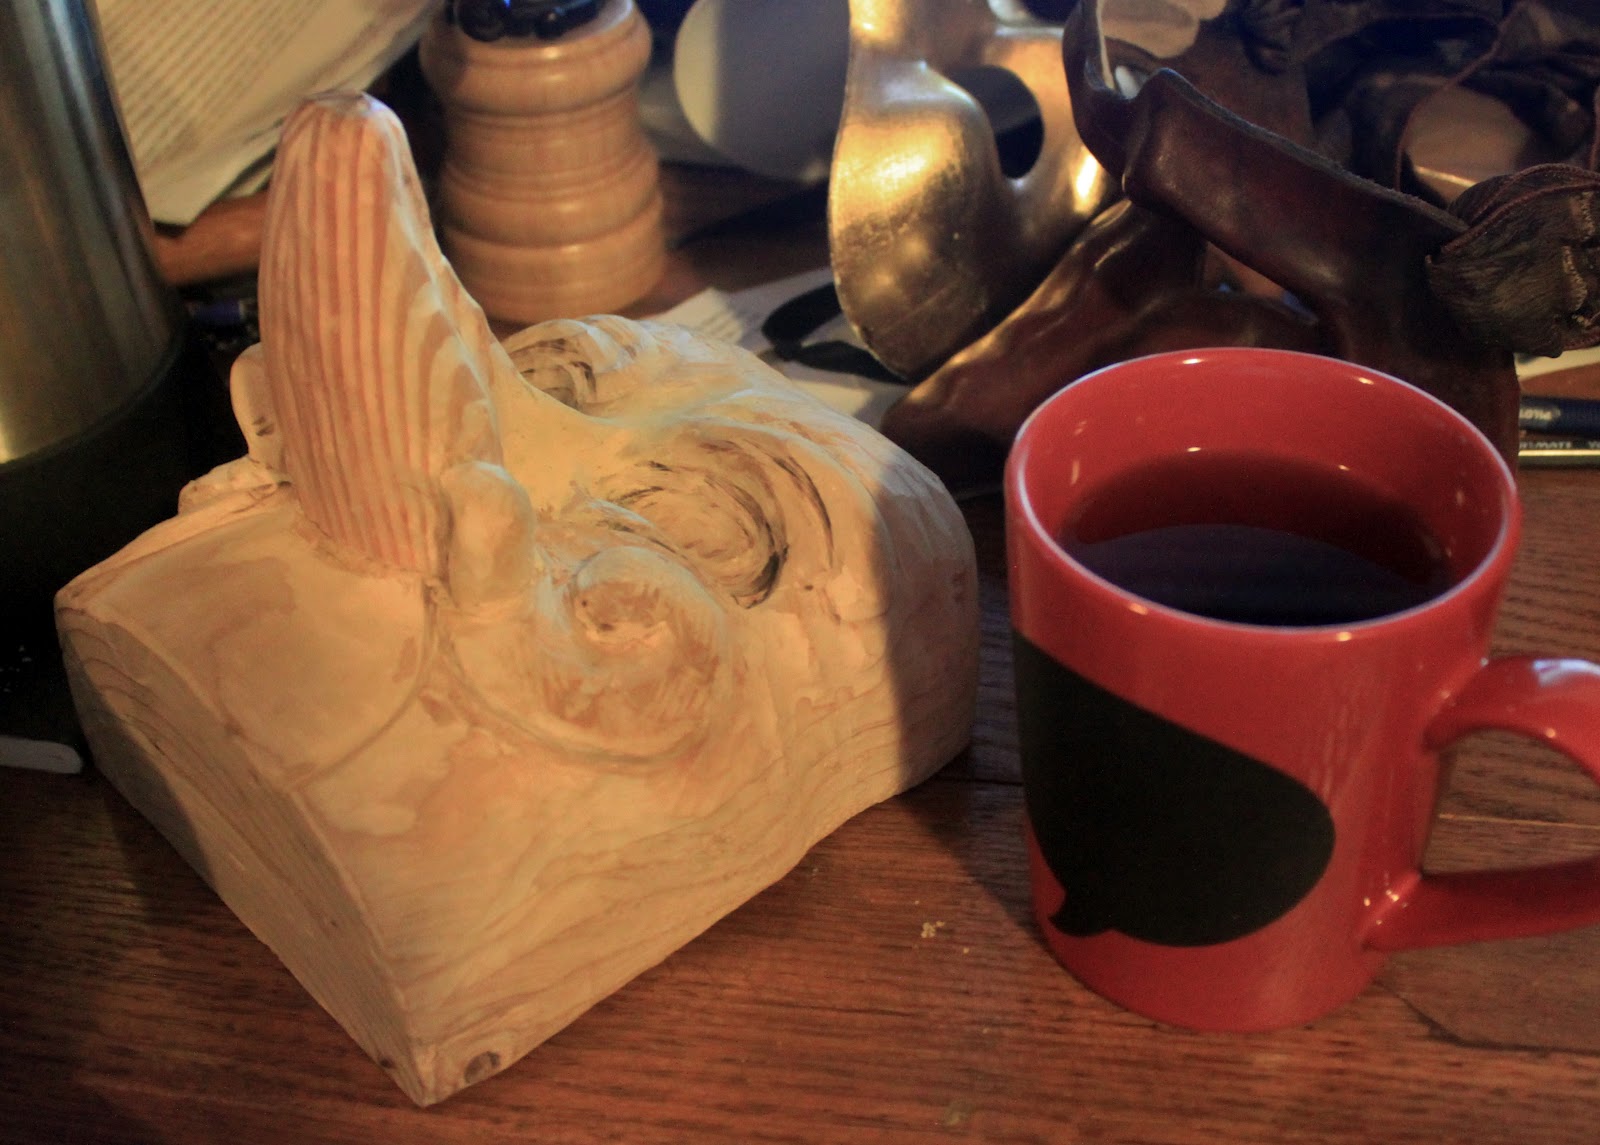
Real woodcarvers wear pink. (ahem)

The trouble with being on the road so much recently is that you can't take things like masks and wood with you. On the road, it's handsewing; at home, it's all about the carpentry. So I've been clearing a backlog of masks that I promised to folk, which means a lot of carving and a boatload of forcing leather to do things it doesn't want to do.

This is why I often call myself a sculptor of reluctant media. Between the wood and the leather, my hands are full just discovering the way they want to go and then trying to get them to go there.

This is starting to look like a leatherworking blog rather than a broad-scale costuming blog and for that I apologise to anyone who doesn't want me to dwell on wood and leather and would like to see a bit more cloth. I'll get back to cloth soon. I promise. In the meantime, here's some more leather mask making.

If you are new or looking for instructions on how to make commedia dell arte masks, or just leather masks in general, you will find a tutorial here that gives you the basics of the craft. Yes, the craft. The art of the thing is up to you to bring to the table.

Try as I might, there's only so much of this that can be taught in a blog format.


I mentioned the horn mallet in passing in my demo on the tiny mask. They're kind of a pain
to make, but no one sells them, so make them you must if you want one. "Drill hole, epoxy
handle into place" is a deceptively simple set of instructions. A lot of fussing and cussing is
involved. Most of the other tools used to do this thing can be purchased anywhere that clay
tools are sold. Assuming you don't want to make those too.


The horn mallet not only helps shape it by forcing it down into the grooves and valleys of the matrix, it also compresses the leather, stiffening the mask. The dimples can be smoothed out or left as a texture. I like leaving the dimples around the periphery of the mask and sometimes in the valleys. Texture helps those areas recede visually. (Domino-style minimum coverage zanni mask, commissioned.)


These masks are notoriously difficult to photograph. Note how the dimpled texture helps define the high points from the low. Combined with the shading provided by an careful application of the dye, the mask takes on additional dimension and character. The nose seam on this one was a bit of pain. (Domino-style minimum coverage zanni mask, commissioned.)


I just love this color. The challenge here was making a mask that was non-threatening and cheerful. Most zanni masks tend to look a bit maniacal under the best of conditions by design. Raised brows and wide-open eyes are part of the recipe. I also borrowed the Arlechinno spiral cheeks (which I'm told was historically meant to indicate a handlebar mustache -- automatically awesome).


The trick to pulling off a large full-coverage nose like this one is the inevitable seam where your leather wraps around the nose. I've heard it described in a dozen places, but really this is one of those things that you have to figure out for yourself. This is where craftsmanship is king.


Mask matrices can be re-crafted a couple of times. For a one-off commissioned piece, I'll use the matrix in its original form only that one time. This one has had the nose shortened and re-positioned and cherubic cheeks added using wood putty. Recycling is good.


When I retire mask matrices as I have these two, I usually put a hanger on the back and hang them up on the wall, which is the fate that these two are currently awaiting. 

26 May 2012

Making Leather Commedia Dell Arte mask - Tutorial and Demo

In case you ever wonder about why I take so long to complete some of these projects, I'm always working on something, even if I'm not blogging about it. I've been working on commissioned masks in the commedia style.  I'm not going to turn this into a maskmaking blog, but I did a tutorial series awhile back on making a miniature version of my favorite mask.

Maskmaker, Maskmaker, Make Me a Mask

Part One: Planning & Carving
Part Two: Carving & Completing the Matrix
Part Three: Prepping the Leather (Skivving Tutorial)
Part Four: Molding the Mask (Wetforming Leather)
Part Five: Finishing the mask

Now if you will please excuse me, I've miles to go before I sleep...


19 May 2012

Leather Jerkin: The torso is done

The body of the doublet is essentially done. I have one collar bit to finish and that's it. Now I start on a sleeve treatment and settle on which of the two options I've been toying with for the waist and shoulders.

My favored option is to go with the shoulder and waist treatments on the Museum of London jerkin. Especially after finding this delightful child wearing a similar jerkin at left. I like the fall of the squared-off wings and the waist treatment suits me well, I think.

In the meantime, I have completed the body of the doublet both in sewing and pinking. All that remains is attaching the shoulder and waist treatments and then tacking in the silk lining.

Please excuse the blue jeans. I was so excited to be almost done, I threw it on and ran outside with my lovely and patient photographer to catch a few shots in the sunshine...


Still not entirely convinced that the pinking necessarily makes the leather more pliable as Janet Arnold proposed. Maybe I didn't make enough pinks, but I'm not certain I could pack them in any closer without making the leather unable to hold itself together. But does look cool and what more can one ask?  It also occurs to me that on a hot day, there are worse places to have additional ventilation...

I will add eyelets at the base when I do the skirting to accomodate lacing/pointing on occasion when I 
wear it without a doublet beneath.

Buttons are attached to a thong running up the inside of the doublet, pushed through and laced to the 
shank at approximately 1.25" intervals. This attachment is used on the Museum of London doublet, as 
recorded by Janet Arnold.

The buttons are a pewter reproduction set that I bought on the internet years ago from Tudor Shoppe. 
They are no longer available in this motif. At the time, that was the only place I could find them, but 
since then, there have been many more places popping up that sell repro buttons, including the ladies 
at Tudor Tailor who have an excellent selection. The next ones I buy will be from them if I don't just 
buy some actual 16th century buttons off Ebay and clone them myself.

A better shot of the buttons and button holes.


13 May 2012

Leather Jerkin: Pinking & Slashing

Our German friend to the left there is probably responsible for the fashion for slashing and cutting panes into garments in the 16th century.  Costume historians tell us that the flamboyant outfits of the German Landsknecht originated in the tattered garments of the battlefield and the booty. Very quickly, those slashed and draped fabrics became quite stylized as you can see from our fashionable friend, illustrated by Jost Ammon.

The fashion reached its high point in flamboyancy in the late 15th and early 16th centuries, as Teutonic mercenary legions carried their taste for stylish rags across the continent.  By the late 16th century, which is my preferred period for costuming, things had died back quite a bit and the pinks and slashes tended to be smaller, but made up for it in volume.

The leather jerkin I am making is not an exact replica of a painting or extent garment. Though it is inspired by the one at the Museum of London that first inspired me to imagine I might want to wear a leather vest in the August heat.  That garment is pinked with shaped punches to form a Lucky Charm cornucopia of hearts, stars, and diamonds. It's quite a whimsical garment, and if memory serves, Janet Arnold opined that it was meant for a child, a page in Queen Elizabeth's retinue.

Garb Carpenter

I don't have any punches with whimsical shape, nor do I have the time or inclination to make some. For those interested, I am told that Tandy leathercraft now sells punches in the shapes you would need for making the Museum of London jerkin.  Instead, I will be using assorted sizes of round punch and a nice sharp set of cheap bench chisels that I wouldn't want to use for woodworking, but are ideal for cutting leather.

If you want to do this at an event, the chisels used in the 16th century for this are pictured in Queen Elizabeth's Wardrobe Unlocked and a replica set in the back of The Tudor Tailor. I would link to someone currently making them, but I can't find anyone and all the leads I get take me to sites for blacksmiths who are no longer in business.  Apparently not much demand for these things.

The chisels I'm using came in a cheap set that I picked up from Harbor Freight. They're not what I'd choose to use for a woodworking project; they're okay steel but not great.  They do, however, hold an edge well enough to cut leather if you take care of them and keep them sharp.

If your chisels aren't sharp and you don't know how to sharpen them, take the time to learn to do it properly. You will be glad you did.
FAIR WARNING: Do not use a steel tool on damp leather. Make sure both are dry or the iron in the chisel will stain the leather black. Ever wonder why black leather was so prevalent for so much of history? That's why. Put it in an iron-oxide bath and your leather will be black before you know it.  This is why leather stamps tend to be coated or made out of stainless steel.
There's not a lot to say about this, so here are some pictures...


There's not a lot to say about this process other than to show you some pictures.


This picture gives a good idea of the size of the slashes. Also dispels any notion you might have that I'm a manicure sort of guy...
After examining as much as I could of some period ones, I didn't want it to look too precise. I marked the larger holes 3/4 inch apart, and marked one edge of each slash, one inch apart, then free-handed the rest of the holes and the angle of each chevron. So there's a bit of variation in each.

I decided to eyeball the chevrons to keep things from looking too staid and mechanical.

A decent set of hole punches is worth its weight in gold when you're doing this.

This is the back of the jerkin, almost done.
On the youth's jerkin at the Museum of London, Janet Arnold opined that the diamonds of holes at the back of the neck were intended to increase the pliability of the leather.  It certainly does that, but not so much that I'm inclined to think she was right. There are easier and better ways to make thick leather bend where you want it to, mostly by thinning it, which is considerably less work that this was. Honestly, I think it was decorative and the pliability thing was a nice bonus.

It is pretty, though...


12 May 2012

Leather Jerkin: Sewing & Seams Revisited

It is time to sew some leather. This project will be a combination of some machine stitching for the structural seams and then a lot of handwork to finish up the edges. 

When I first mentioned this project, I showed quite a few seam options and talked a bit about the unique concerns of sewing leather garments. Some of these problems are basically created by machine sewing, which is one reason I'll be doing so much handwork on this doublet.

One of the concerns of sewing leather that you don't run into with cloth very often is friction. Leather will build up friction against the bottom of the standard stainless steel sewing machine foot.
There are a couple of options for addressing this. One way I've seen work is silicone-impregnated "parchment" paper, sold in cooking stores. A few years ago, my wife bought me a foot that has been coated in Teflon. They're a bit spendy, but less fiddly than working with sheets of parchment.
WARNING: Not all machines are strong enough to sew leather. If yours is not, you can actually burn out the machine or strip the gears, so if you're at all unsure, I'd say you should handsew or find someone with an industrial machine they can loan you.

Stitches & Seams
There are two essential kinds of seam that I will be using on this project and they are not the ones I'd intended to use.

I was planning to make a lot of use of what I call the "Arnold" seam in honor of Janet Arnold, who wrote the book where I saw one the first time. In the Arnold seam -- which she documented for a couple of different extent leather garments -- has a piece of thinner leather sandwiched into a seam to protect the stitches from being rubbed or ripped apart.


When I started using that style on some of the test pieces as shown above, I was dissatisfied with the final effect. Instead, I will be using the lapped seam discussed earlier, and in lieu of the Arnold seam, I will use a felled seam which gives strength greater even than that of a lapped seam and also lends a structure to the garment akin to what you would get from light boning.
The felled seam is a simple enough concept.  Sewing right-sides together as you would any normal seam, cutting away one side and then folding over and sewing flat the remaining seam allowance to finish the seam.

The examples below were all sewn on the hotrod.


11 May 2012

Leather jerkin: Pattern layout & Preparation

Today, I finally get off my duff and begin my leather jerkin project...

Patterning, Plotting, and Planning:Orienting pattern pieces on a piece of cloth is fairly straightforward. Cloth is woven with a definite grid of warp and weft fibers, so you know what you're going to get. Stretch on a piece of cloth runs on the diagonal (bias) because the fibers slide more easily diagonally than they do laterally.

Because leather was once the skin of an animal, it has its own concerns where placement of pattern pieces are concerned. Leather has a lot of give to it and while there are definitely directions in which the leather stretches better than in other directions, those are not necessarily uniform across the entire hide. As discussed in the posts on mask making, the areas nearest the belly of the animal are the stretchiest.

Alcega's doublet pattern layout on a rather narrow width of cloth.

There are a lot of other factors that play into these considerations, including the origin of the leather (cow or calf, sheep or lamb, deer or doe... etcetera.) Breed, gender, and age are huge considerations in choosing leather. Female and/or younger animals have suppler hides because their skin is higher in collagen, same as my skin is not as supple as a lad half my age. Even on leathers from the same animal, how the leather was tanned will be another consideration.

This is all compounded by the fact that unlike the cloth that comes from your local weaver, leather thickness is not uniform across the whole of the hide. So pattern pieces should be oriented so that the thinner places are along the outer edges where you were going to have to skive away leather anyway.

Pattern Placement and Cutting:
Holes you make in the leather won't 'heal' like they do in cloth. So we can't really use pins. I know some folks use them in the seam allowance, but I don't like to do so. If you feel that you cannot get by without some pins, then to the seam allowances with you!

I lay the pattern pieces on the back side of the leather and either tape them or weight them down and trace around them.


Note the way I oriented the pattern pieces in the photo above, taking the most advantage of areas of leather free of things like bullet holes and other imperfections. Unless you have in your project budget to buy multiple five-star hides and use the best of each, some imperfections are par for the course. They add character as far as I'm concerned.

Also, note how the stretchier areas at the edges are kept to the areas that will need to be stretchier and/or thinner on the final garment.

Stabilizing the Leather:
There are ways to get leather to be more stable as a final garment and I'm going to use a flat lining technique with a slightly... okay, very modern twist.

Once upon a time, I bought a leather sport coat at a thrift store and took it apart to use the leather for something else. I was surprised to discover that across the whole of the garment, the leather had been glued to a piece of lightweight interfacing.

The interfacing peeled right off, as pellon is wont to do when thumbnail is applied, but it was a bit of an "Aha!" moment for me.

A jerkin needs to be a fairly structural garment, even if made from a lighter leather. Because I'm using a very stretchy skin, I plan to adhere my leather to a denim-weight canvas using a spray adhesive. This will bond the two together so that I can treat it as one layer. This adhesion will be backed up with stitches later, but the adhesive allows me to work with it fairly roughly (note that I've used a chisel to slash one of the test bits below.)


You can use almost anything for this from lightweight pellon to a cheaper hide if you want. It all depends upon how much structure you want or need to lend your final garment.

The final pieces. Cut out and stabilized.


Is this a period technique?
Well, 3M was founded in 1902 and probably didn't start making aerosol adhesives until the 1950's at a guess.

Flatlining certainly is. Using layers of fabric to reinforce and stiffen areas of cloth and leather garments, certainly. Gluing it on?  I don't really know. 

If you wanted a more period-appropriate method, do the same thing with linen or hemp canvas, adhered with hide glue. It would accomplish much the same thing, but hide glue is messy and much stiffer than the 3M spray product I used here. Which is why I opt for the modern convenience.

The adhesion provided by the glue will allow the two pieces to move as one, each lending the other its greatest strength. The denim lends the leather body and the leather (and the glue) keep the denim from fraying out too much where I've slashed it.

I'll talk more about pinking and slashing in another post.

10 March 2012

A Leather Jerkin

Dear Readers: I will be traveling for a family emergency for the next couple of weeks. This is the project I planned to start this weekend; instead we'll be getting into it when I get home.  Take care, and I'll see you when I get back!  ~Scott

Youth's leather Jerkin, Museum of London. Detailed in 
Patterns of Fashion, 1560-1620 by Janet Arnold.
Next on my list of Things to Make is a leather jerkin. Doeskin, to be precise. It is quite probably the garment I've procrastinated most of anything I've ever contemplated doing ever.  Don't believe me? I bought the leather ten years ago.

This silly thing sorta scares the crap out of me for no reason at all. It's not that I've never sewn leather before. And it's not that I don't know how to make it. Honestly, I think it's the degree to which I coveted the leather jackets that all the cool kids were wearing back when I was a kid thanks to Top Gun and Indiana Jones, and the even greater degree to which my dad refused to let me buy one or buy one for me. They were too expensive. They were luxury items. Dad didn't hold with such things...

When I finally got one, they were no longer cool, but I treated it as if it had been made of bone china rather than one of the tougher materials known to man and had been beat to crap (aka "distressed") at the factory.

And it doesn't matter that I've owned dozens of leather coats since or that I've sewn sheaths and bags and purses and gloves and hats and masks and miscellaneous whatnot out of leather. Making a jacket just seems like a bridge further than I've ever been...

Then I did this to a perfectly good leather coat I picked up at a thrift store and the bloom came off the rose.  This new character is the perfect excuse to finally unroll those doe skins and make that stupid jerkin.

So let's talk about how.

The leather I'll be using is doe skin. That is to say the leather made from the hide of a female deer. This kind of leather acts a lot like cloth: you can run it through a sewing machine, sew it fairly easily by hand, and it stretches and drapes rather like a heavy wool.

Thread
I will be making mine almost entirely by hand, using a waxed linen thread. The natural linen thread shown in the picture is bookbinding thread. Pre-waxed thread can be found at leatherworking stores or online, or there's a brand of unwaxed linen thread called Londenderry that can be found in specialty embroidery stores in a variety of colors.


Needle
Working in leather like this will require a "glover's" needle, which has a beveled tip for punching through the leather. Thankfully, even the big box sewing stores seem to carry them.

Let's get into this right away...


Stitches & Seams
There are two essential kinds of seam that I will be using on this project.  Almost all of the stitches will either be saddle-stitch or running stitch. The seams will be the 'lapped' seam or a reinforced version of the standard pressed seam for reasons I'll get into in a minute.


If you just lay two pieces of leather atop one another, right sides together, and then press the seams back as you would when working on a cloth garment, you're going to have problems. Where the needle has punctured the leather, you have created perforations (think the perforated 'Tear Hear' line on a document). And if you hold the seam up to the light, you'll see a 'ladder' of stitches which are exposed and weak.

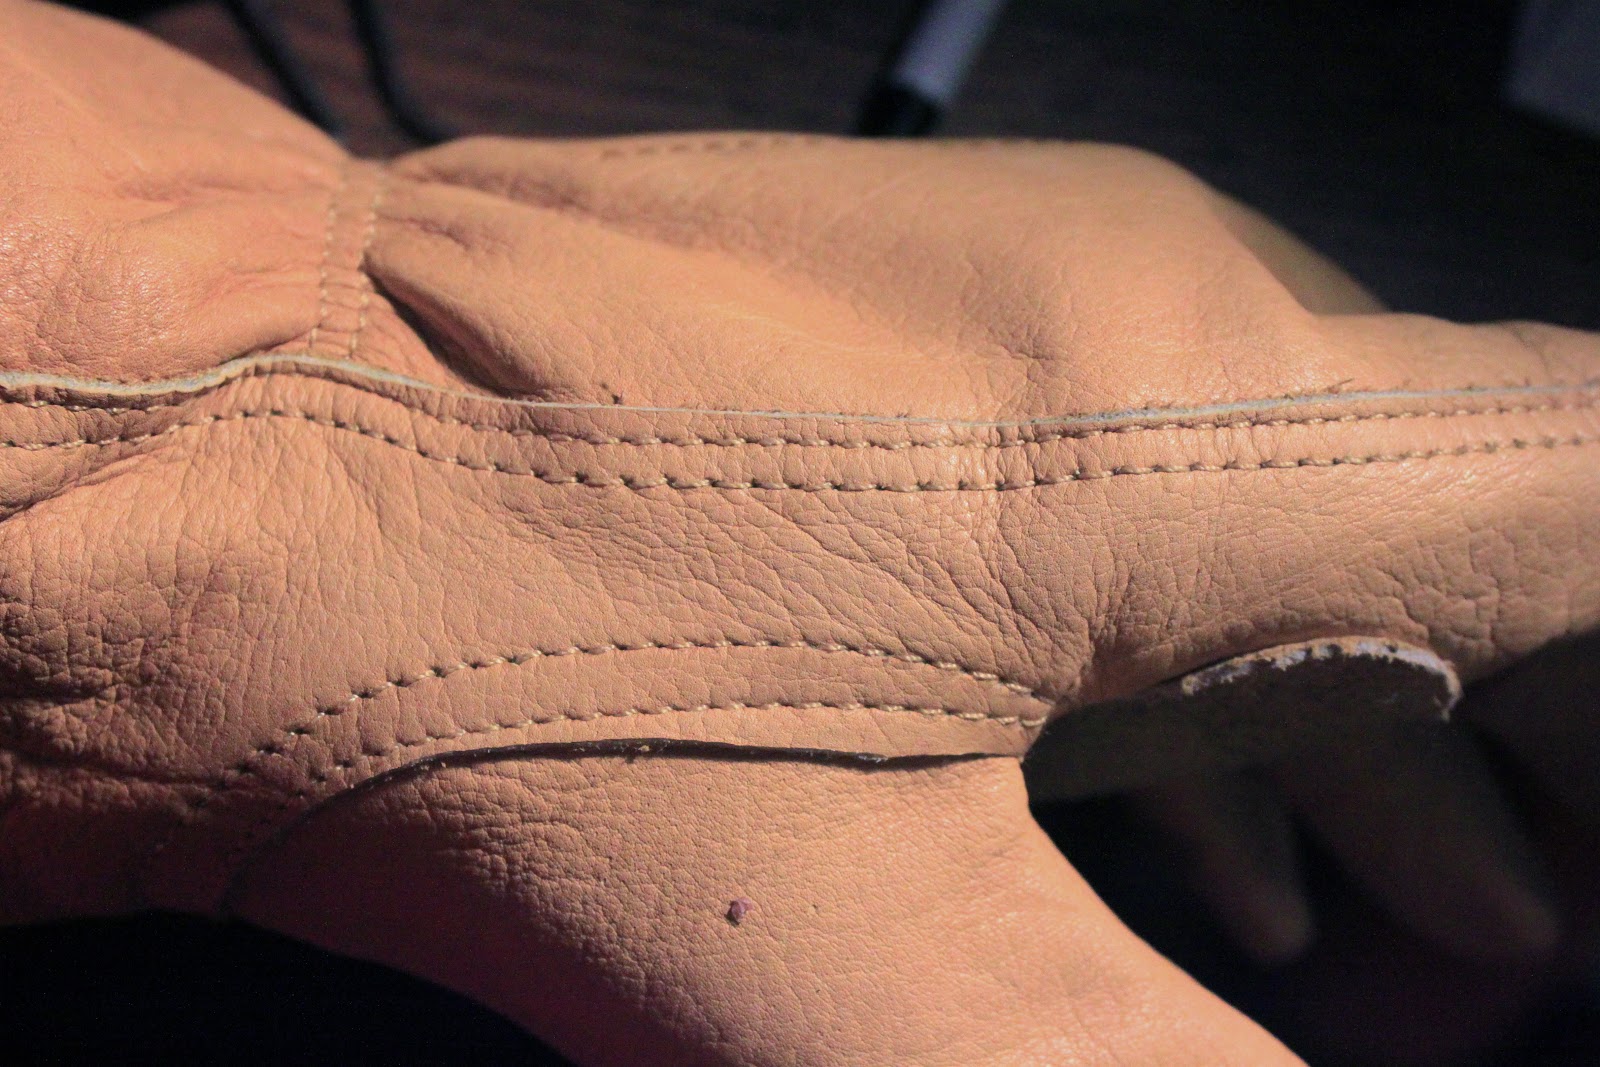
The image above is a pair of doeskin workgloves I had handy. You can see the stitches of the seam at every fold and they never fail to fail at these points. This is a very unstable way to sew up a piece of leather.

When working leather, you need to work with larger stitches and use the right seam for the right task.


The "Arnold" Seam
As I said, you can't really just sew leather and iron the seams flat (actually, you usually pound them flat with a mallet) like you do cloth, and a French Seam is unworkable because of leather's bulk and stiffness. Even if you pare away the leather of the seam, you would end up with a standing seam that refused to lie down.  You could sew it down (a felled seam) or any one of a dozen other solutions, but I'm going to go with a period solution that I rather like.


The leather jerkin at the top of this post is in the Museum of London. If you click on the image, it should take you to some very large and detailed pictures at the museum's website. On that doublet, Janet Arnold noted that some of the seams had been sewn with a piece of lighter leather between them.

In the Museum of London jerkin, a much lighter piece of leather is doubled-over and inserted into the seam. Other seams documented by Janet Arnold use a similar approach and there are many that are reinforced on the inside with pieces of linen canvas. I will be doing that too.


Lapped Seam

One of the great things felt, felted wool, and leather have over woven cloth is that it doesn't fray. So you can do things like poke holes, make cuts, and do lap seams without worrying about it falling apart.

A lapped seam (shown left on the same pair of gloves as previous) is simply overlapping two pieces of leather and stitching the top one to the one underneath.  There are several different variations of the lapped seam and they appear in garments from the distant past to the jacket I have hanging next to the front door as I type this.

If you double-up the stitches as shown in the picture at the right, it makes an incredibly strong seam if you don't mind the stacked effect that results.  This is a great seam for long, flat sections like the seams of a jerkin or a doublet.

I will be using a combination of the lapped seam and the 'Arnold' seam to assemble this jerkin.