Showing posts with label Fitting. Show all posts

20 October 2006

Doublet Deux

Getting back on track...

When last we left our intrepid seamstre… um, tailor, he was endeavoring to draft a new pattern (ignoring for the moment all of the side projects like the marrionette…) which took into account the shortcomings of the old, and create a new doublet to his liking that can go on to form the moderating and contrasting base for a more flamboyant jerkin which shall overlay. Are you with me now?

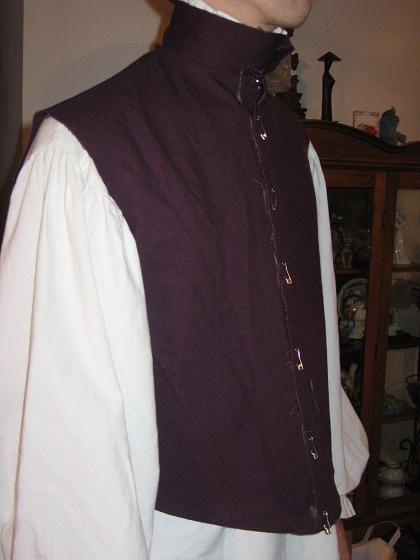
NOTE: Plum color for mockup purposes only.
See previous post for tips on mocking-up...

As you may recall, the color scheme here is autumnal in nature, drawing from my favorite earthtones of rust and mustard (thankfully I’m making garb and not sandwiches, but I digress). The colors were inspired by my favorite set of juggling balls, I kid you not. There’s a picture back in an earlier post if you want to take a look. We find inspiration where'er it hides. Unlike the earlier jerkin project, which incorporated a number of techniques and ideas that were new to me, I have a good deal more experience making doublets and even my past noble projects have followed simpler lines, as I generally believe in letting carefully-chosen textured fabrics speak for themselves. I think that this lends a certain nuance to costuming that helps in bringing me down on my preferred side of the dividing line between my character’s everyday clothing and a costume worn for a weekend and meant to last only that long.

TODAY'S TIP... Draw inspiration from what you've done. This includes acknowledging and mending past errors, and distilling the best bits from the last few projects to make the newest project a culmination of all you've learnt so far.
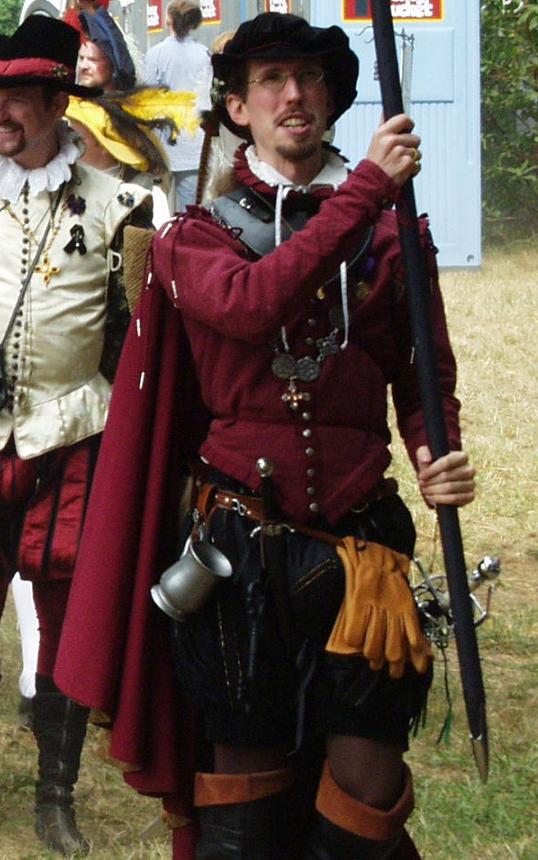
Above is a photo of me looking pompous in an early noble costume of mine. If you’ve read some of my older posts, you’ve likely seen it before in the parrot picture. I like the quilted fabric and the simple lines of the doublet. I need to dig it out and take some more detailed shots ere we discuss shoulder and waist treatments, because I was particularly fond of this one. Small ½ inch loops of match-dyed cotton are sewn into the seams of the waist and shoulders as well as around the collar with the intent of eventually forming a supportasse for a ruff I never quite got around to making.
PRO: Good use of texture, simple lines
CON: Button placket, never made ruff so the collar just came off as a little silly
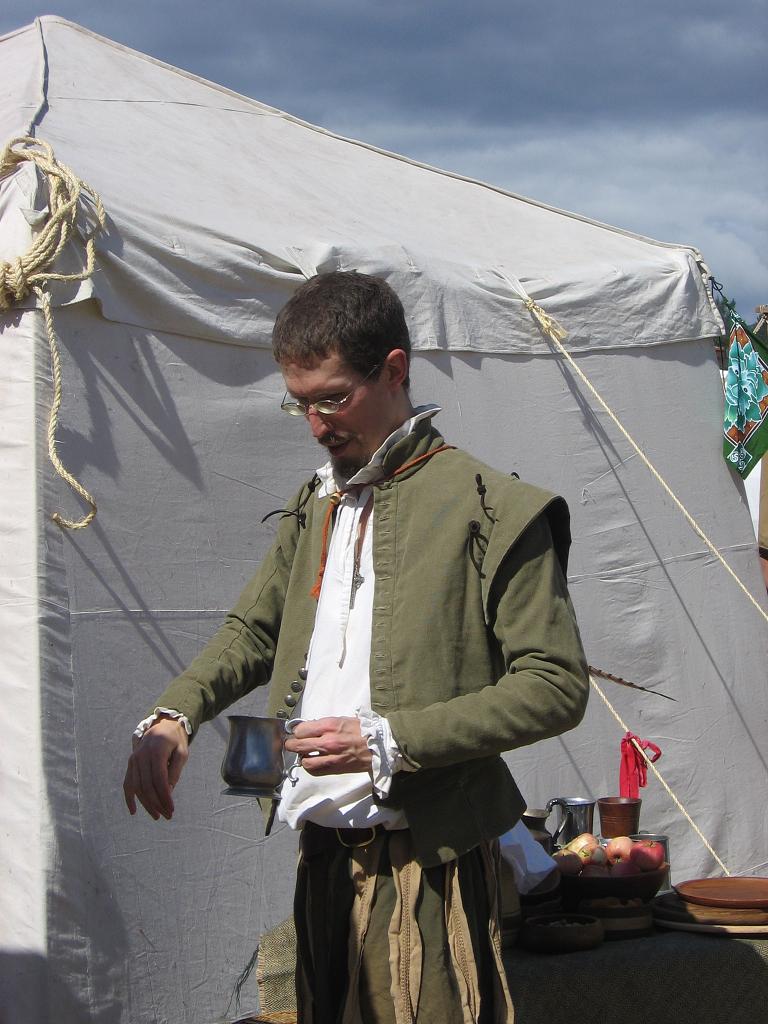
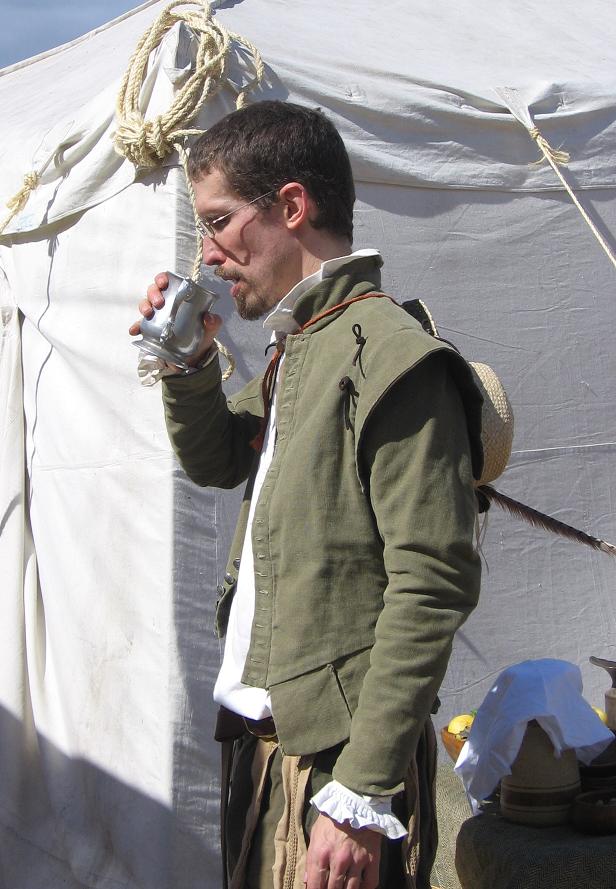
Below are some shots of another doublet o’ mine that I am particularly fond of. The cotton canvas is a sage green (much faded by the suns of a dozen faires) of very much the same weight as the rust-colored stuff I used for the jerkin project. I like the heavy open-weave texture of it and the way it turns supple with time and wear. I even like the way it fades, though this doublet started out solidly middle class and has degraded somewhat with wear to a lower middle class garment. But that’s part of its charm, methinks.

PRO: Simple lines, very workmanlike and utilitarian, love the pewter buttons (difficult to see in the picture), Best fitting of all my doublets so far.
CON: Fit might belie the doublet's class somewhat, has a button placket

A SIDENOTE ON THE SUBJECT OF FITTING… I am a slender fellow. The name “Ichabod Crane” leaps to mind when I flounder about for a literary reference to describe myself. As such, I oft-times find it difficult to draft all the wrinkly bits and pudgy bits out of my doublets. This used to drive me to destraction until I started to look, and I mean really LOOK at the renaissance portraiture, especially that of senor Moroni. I have been especially inspired (as are many male costumers) by the cut of the Tailor’s doublet and the places in which Moroni recorded the folds and buckling of the fabric in the man’s pinked and slashed white doublet. Many of these ‘faults’ are the very same ones I’ve been tearing my hair out trying to correct for years. And that guy was a tailor, for heaven’s sake! Many of his other paintings bear this out, as do many other painters of the period. Many of the perfect flat front garments in Northern Renaissance paintings were clearly boned or starched when they weren’t stuffed into unrealistically taut potbellies by adding sewn-in bags of cornmeal or the like.

The doublet in the inspiration picture (derived from a painting by mannerist master Moroni) doesn’t lend us much of a clue as to the cut of the man’s doublet other than that spiffy sleeve which is either cutte or tightly paned (I've seen it duplicated both ways with some success) which I am not currently planning to replicate… at least not right away. Other than the color, it is difficult to deduce much at all about the inner garments. The hang of the outer garment suggest that the doublet would be close-cut rather than stuffed with bombast in the peas cod style, more akin to a soldier’s arming jerkin meant to be worn beneath cuirasses. The body of the doublet might not have matched the fancy sleeves and I would be remiss if I failed to point out that I can by no means be certain that there even was an inner garment between the visible Jerkin with sleeves and his shirt. So I am - by necessity - going to operate under certain assumptions.
  1. The inner garment is a separate piece from the outer jerkin.
  2. The inner garment is a close-fitted doublet of a lighter fabric than the outer and is all of a piece.
I’m not even going to dwell on whether that’s really the collar of his shirt that we see or a renaissance dickie like many of the ladies of the courts wore and called a partlet. Partlet, dickie, you say to-may-to, I say to-mah-to…yada yada yada…

We have already drafted a new pattern for the proposed inner doublet and revisited the previous projects of pertinence to the current endeavor and recapped for those just joining in. Welcome and welcome back all of you…


For the inner doublet I have chosen a lightweight brushed cotton, almost a light flannel in a wonderfully understated mustard color. The buttons will be wooden beads and the shoulder, neck and waist shall be decorated only with a pinked strip of folded bias binding in a matching color as shown in the previous jerkin around the neck and in numerous garments featured in Janet Arnold’s Patterns of Fashion. With the help of my dear ladywife, I have (hopefully) drafted away the annoying wrinkle at the back of the neck and I will once again be using an overlap instead of a button placket for the closure.

Next... assembly.

21 November 2005

Clothes Mocketh the Man...

There comes a time when sewing is no longer a solitary activity. So it is with mocking up and fitting patterns. The pattern I use is one I drafted a long time ago and I've lost weight and my desires have changed somewhat as to what I want the thing to look like, fit like, and be able to do. For the looser jerkin which will be worn over a doublet, the old pattern was fine. Since I lost weight proportionally across my frame, the largeness of it was consistant (if that makes any sense) so it suits me fine as an outer garment. For the more form-fitted doublet, that is not the case and I find myself in the predicament of needing a partner to help me re-size the thing.

Now, I've done this for others numerous times and been the guy who poked and grumbled at the 'model' for fidgeting and moving and generally being alive. Well, for all those out there who've had their garments fit by yours truly, rejoice... my uppance has come.

As I've mentioned in the past, I'm not going to get into drafting a pattern from scratch (at least not right away) for several reasons:
  1. I don't need a (completely) new pattern at the moment.
  2. There are so many others out there who have explained it so well that I would be re-inventing the wheel.
  3. I find the process tedious.
However, as I get older I find that my bodyshape has been fluctuating far more than it did in my twenties, so re-sizing my pattern has become an important tool for me. The manner in which I do this works for both genders, by the way (with the obvious changes, of course). I re-drafted the pattern my wife used for her Italian noble bodice with the lacing back seams. I can't say there was a marked difference in the way that went together versus a doublet. Some things really are universal.

CAVEAT: This is how I do this. Kris informs me that there are numerous other ways in which this is and can be done. Also, by the time I'm finished it is quite possible that it would have been less effort to just draft a new pattern. Stubbornness, thy name is Scott.

Since Kristin was one of the first victims of my tailoring pins, it's fitting (pun intended) that she gets to be the tailor this time around.

I laid out the pattern in the usual way on the eggplant denim. This dark heavy fabric has roughly the same body as the final doublet material and is dark enough to see the white chalk lines. If you're using lighter material, use blue chalk. It's not that big a deal, really. White lines on dark fabric photograph better and I'm doing everything with half an eye on how it will look on this site.

I cut out my pattern with an overly-generous seam allowance. (Sometimes, the angle of the entire seam will need to change and a the extra material will allow for this.) Then I basted the thing together with a nice long stitch length. Then I put it on and pin it together in a manner replicating how it will be when it has button holes.

CAVEAT: When you are doing this, remember that you need to account for a final seam allowance. Wherever the rough edge of your fabric is, the real edge will be a 1/4 to 1/2 inch back depending on your preferred allowance. If you don't account for this in the fitting, it will be too small when you've got it put together into a final piece.


In the following photos you may notice that I added an extra seam up the back. I can't remember if I mentioned that when I was discussing plans for the doublet. Every seam you have is one more point of adjustment and makes the fit that much more tailored. Some patterns I've noticed have a back seam, a 'princess' seam, and a side seam, allowing a maximum degree of adjustment. There is such a thing as overkill. At some point your doublet starts to resemble a patchwork quilt.


At each seam, pull the wrinkly slack out of the fabric and pin it. We used safety pins here, I've had good luck doing this with binder clips as well. Look for puckers and obvious fit issues and play with the seams until they're gone.

Keep in mind that everytime you adjust the back or the front piece, you need to keep an eye on your shoulder and neck seams lest they be pulled too far forward or back. Communication between the pinner and the pinned is essential and why doing this over a dress form or duct-tape dummy is not as desireable as having your clothing fit to you. If the collar is choking you, or if the armscrye is too tight and cutting off circulation to your sword arm, the dummy won't tell you.


When you get the fit like you want it, take the chalk and trace along the pinned lines. These will be the place for your new seams.

While you're doing this, the person whose doublet this will be needs to goof around a little. It goes back to what I was saying about making certain your doublet will do everything it will be called to do. Do you need to fence in it? Wear it under armor? Swing from a chandelier? Climb trees? Think of all the things you could possibly need to do and do them, or at least simulate them. Then ask your tailor to make the appropriate adjustments before you take it off. It should be snug, but not too tight to move.

Once the sewing machine in back from the shop, I will baste seams along the chalk lines. Then one more fitting like this one to mark any easements I will need in terms of making or moving the armscrye, collar etcetera (these things move a little when you do that)

---------------------------
All my life I've had trouble buying suits off the rack and I never understood why until I learned to sew. Now that I've fitted and drafted patterns to my bony carcass, I understand why. I'm all torso, which makes pairing up a jacket and slacks difficult without looking like Dick Van Dyke in Mary Poppins when he's dancing with the penguins. Which isn't a good look for anyone, in the renaissance or whenever.

I sometimes wax prosaic about why we differentiate between a costume and garb. A key part of what makes an outfit cross the costume/garb barrier is fit.

In my mind, Costumes are put together to look good for a short time. Some of them look spectacular for thier intended lifespan: the run of a play, the costume ball, or even the run of a season of faire. But it's in the final weekend of a three-weekend faire that you begin to see the difference between costume and garb. If your faire lasts more than a month, the people wearing costumes suffer like a sprinter who entered a marathon and thought they were doing well because they led the first half of the race. Marathons are won in the final mile.

I have nothing against costumes per se. But if you sew your renaissance wear like I do, with fit and function as your watchwords, stressing wearability and endurance... well, you'll be wearing clothing, not costume. And - for me at least - that makes all the difference.

-Scott

20 October 2005

Great panes...

Disclaimer... If I dug though my old text books from art school I could probably come up with a better name for this feature than 'sleevelet'. But the books aren't in a convenient place at the moment, and I'm too lazy. Not to mention that in the big picture, nomenclature doesn't seem all that important at the moment. If anyone has a 'proper' term for it at their fingertips they can email it to me, but in the meantime I'm going to stick with 'paned sleevelet'


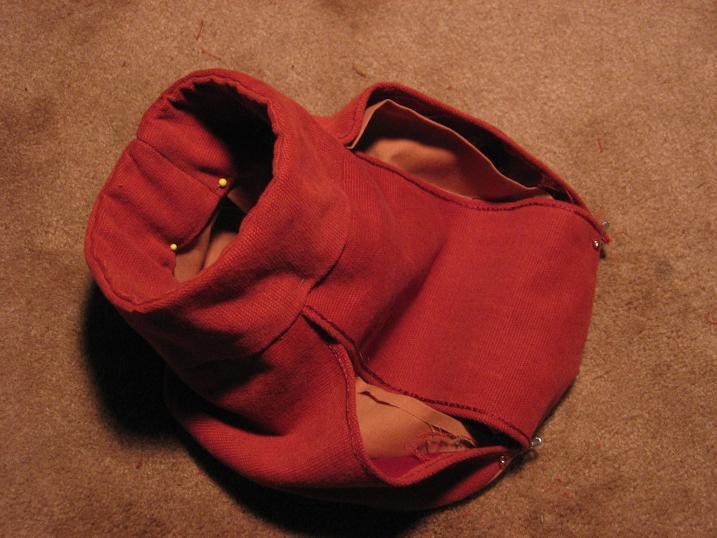
I finished the rows of straight chain stitches on the panes and I've assembled the sleevelets. Below is a pic of the cuff with the panes sewn into it before I turned it and tacked it down. The cuff piece has a arch to it, which is why I clipped the edges prior to turning as you can see.


The dark burgandy layer is the canvas I used to interline the pieces. Yes, I know, I said something heartfelt in a previous post about interfacing being easier than interlining. Keep in mind the other things I said about only using modern conveniences where I can get away with it. In this case I think that modern interfacing would make the lines too stiff and starched-looking. Since an interlining is essentially only attached where the stitches hold it, it can give pieces like the panes and cuff of my sleevelet structure without forcing them to hold thier shape to an almost starched extent.


Trimmed and turned. At the moment it's just pinned together to check the shape and see if adjustments need to be made before there are too many seams to pull.


This is the scrye where it will eventually be joined to the body of the doublet.

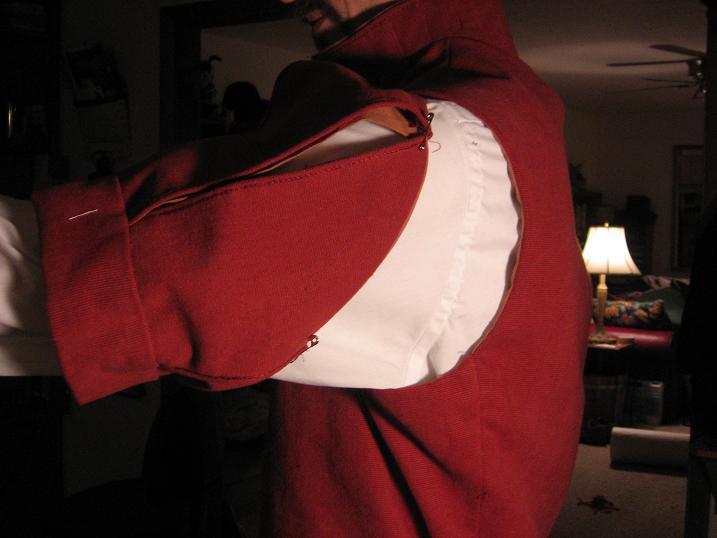
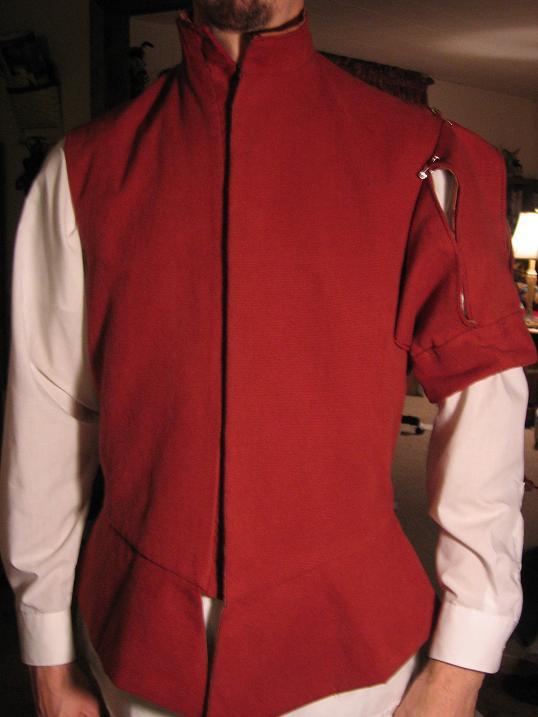
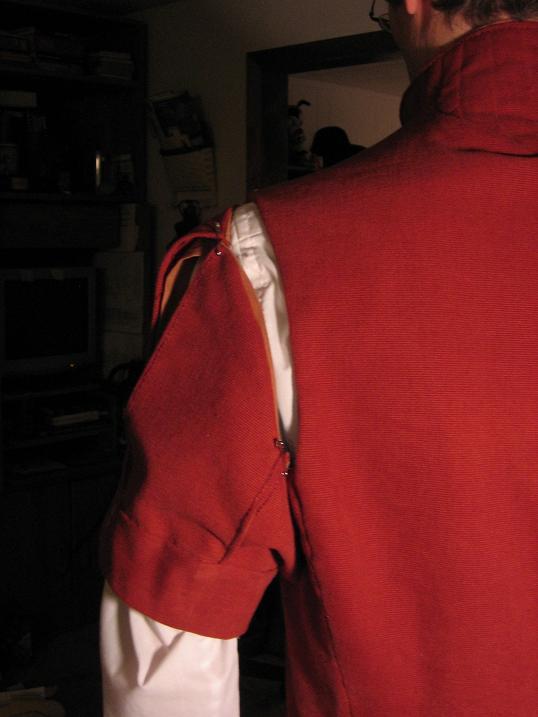
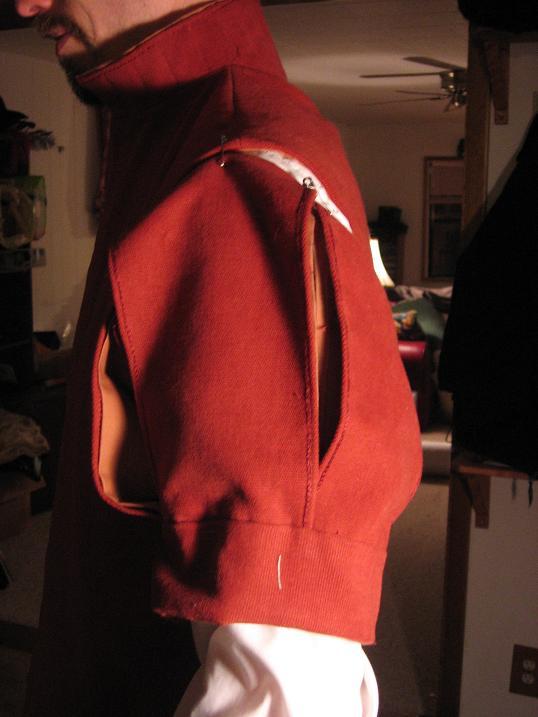
Since I've never made a sleeve treatment such as this one, I thought it meet that I should pin and pose, trying out the thing and making 99.9% sure I got it right before I actually sewed it on. The sleeves of the doublet will be laced on, because I prefer that method overall, but in the Moroni painting the jerkin I am copying looks like it's been sewn into the armscrye. This is unusual according to most of my reading, but the painting shows no visible signs of lacing or points holding the sleevelets in place, so neither will this jerkin - or the final one.

Note: I didn't have one of my usual 'renaissance shirts' handy, so I'm wearing a white dress shirt in these photos. It doesn't really matter because at this point I'm just testing the angle. The 'bulky armpit' tests will come later when it's tacked on a little more securely and I can get a real feel for how it will go. The nice thing about panes is that they can be moved to expand or contract around as much or as little thickness of fabric as I am likely to find going through that armhole anytime soon.


At Extension


Front


Shoulder back


Shoulder profile

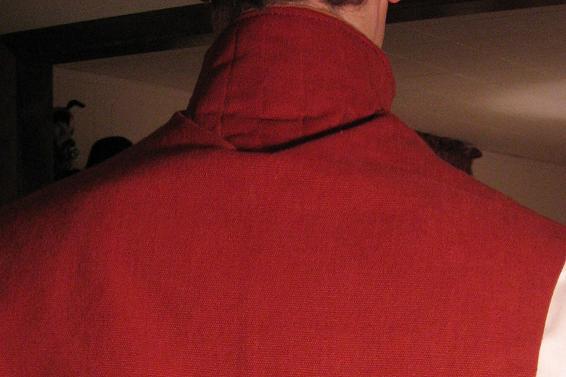
I'm pleased so far with the similarities with the jerkin in the painting. There is a small issue at the back of the neck, however. It is possible that partially quilting might not work in the long-run. The point where the quilting stops has a pucker that just won't go away. I'm still looking for solutions to this (other than quilting the whole damn thing, of course). Maybe some of that cheap ultra-flexible boning they sell at fabric stores or some broom straw or something... I'm sure I'll figure it out eventually.


No matter how many times you've done this, the course of sewing garb never runs completely smooth.

18 October 2005

A short one...

Quick Update...
Sadly life is not all four-day weekends and garb-o-thons, so this one will be quick and not incoporate a great deal. Mainly I have been cleaning up my quilting and handsewing the back seams.

TIP OF THE DAY:
If you're quilting something add two inches on all sides to account for 'quilt shrink'.
or, better stated:
Consult your experts before you start.

My wife is an avid quilter so I'm lucky. I may not claim to be an expert, but I'll call her that with no hesitation. So my quilt consultatn is in the next room when I need to ask a quilting question that will save me a boatload of fabric and stitch-pulling headaches. Remember that, folks... two inches of what she calls 'Quilt Shrink' as the quilting stitches pull the fabric down into the 'ditches' and thereby cause the fabric to contract and appear to have shrunk. Which turns out to be functionally true.

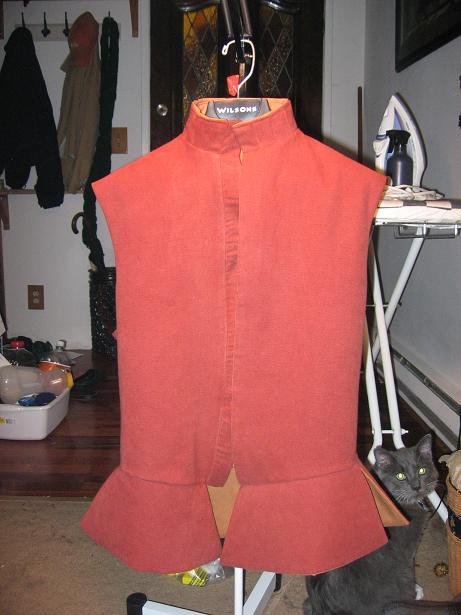
Anyway, I also sewed the peplum on so the thing actually looks like a jerkin now. Here's a quick picture before I head off to bed...