Showing posts with label embroidery. Show all posts

23 March 2011

The Worshipful Company of Glovers Museum Collection is Online!

Speaking of gloves, this wonderful link comes to us via the folks over in the Tudor Discussion Group on Facebook.  So many pretty things to look at.  Most of them are sadly 17th century, but there's a good deal from the Jacobite period and (my wife hastens to remind me) more examples of early European knitted gloves than I've ever seen in one place at one time.

The Worshipful Company of Glovers of London

The Glove Collection and its Catalogue


Tell them I sent you!  (It won't get you anything, but it might confuse them long enough while they try to place my name that you can get a good look around...)  Cheers!

18 July 2009

Crewel World II

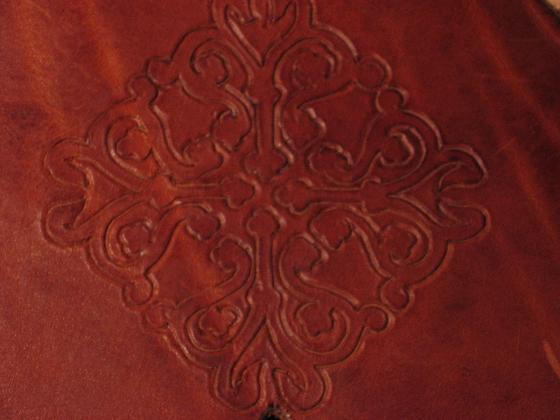
In Crewel World part one (click to go there) I talked about a rapier carrier I made a long time ago. The design incised into the leather (shown above) is drawn from a tile in a cathedral somewhere. Sadly, I've long since lost the original picture the design was based upon as it was many years and a couple of computers ago. Nevertheless, the design has been re-cast in whole or in part on a great deal of the garb I've made since then.

Yesterday, I did it again. For the lid of the purse I'm making I brought the design into a more Elizabethan vine motif and coloring while maintaining the original cruciform arrangement of the elements.

The design was drawn onto the green canvas with a stick of graphite (you can still see some of the marks in the photo below) and backstitched over the marks with crewel yarn to give dimension to the embroidery. The backstitching was covered with satin stitch, and buttonhole stitch using linen and wool thread.

I chose a darker background color that the off-white used in the inspiration garment (and other very similar designs scattered through the Elizabethan world). This is because my hand will go into and out of the purse fairly often, making this an item that will be especially prone to getting dirty.

The aforementioned inspiration garment can be found here: http://www.plimoth.org/embroidery-blog/. The folks at Plimoth were re-creating a heavily embroidered late-period jacket entirely by hand. This entailed reconstructing unknown stitches and techniques. I say "were" because the funding for the project has been canceled owing to the current economic troubles. (The embroiders involved have vowed to continue despite the lack of funding, so there's hope.) Follow that link, you will be amazed.

17 July 2009

Site layout changes...

I spent the day embroidering a lid for my new belt purse and it's almost done. Photos will be posted soon along with the Manly Pursemaking Demo. (Don't worry, you won't have to embroider anything if you don't want to. I'll show you how to get around it!)

Blog Template Updates
So... the site template is all new.
What do you think?

Is it better? Is it worse? Be honest! Use the comments below because I've never had much luck with Blogger's "Poll" widget.

23 February 2008

DeMedici Doublet...

So I want to make a 'sampler doublet' to practice and test techniques prior to making the final outfit based on the historical example of the DeMedici grave goods. A wearable prototype of the final so I can fully test the outfit beyond merely making a mockup or muslin which shall henceforth be known as "Medici Mark I".

According to Janet Arnold, the original garment was probably of crimson stuff that has since faded to russet. That being said, russet is a better color on me, and I like it better, so I'm going with it. The final will be made from russet silk and velvet but otherwise I shall stick perilously close to the original... I hope.

A Whiter Shade of Pale...
It's time to choose the fabric for the prototype. Since all of my prototypes have to result in wearable garments, fabric selection is as important as for the final. It's also a grand opportunity to reduce the bulk on the shelves of fabric in our sewing room. Yes, prototyping masquerading as Stash-Reduction!

I begin the choosing by tallying what I want from the final...
  1. It must be white.
  2. It must have good texture from a distance but the texture cannot overwhelm the final embroidery.
  3. The design-if it has one-must be acceptably period so I can wear the final garment to faire.
  4. It must not be so friable that I cannot pause mid-stitch to take pictures for this blog without coming back to a mess. (ahem)
  5. It must be from the shelf in the sewing room and not the fabric store. I want this project to reduce the stash, not add to it.
I was reading through a book called "5,000 Years of Textiles" and marveling at the breadth and depth of the weaver's art in the 16th century and especially their ability to get textured effects using cut and uncut velvets. One of these was an imitation of strapwork with alternating velvet areas and smooth areas.

This upholstery fabric from my stash bears a striking resemblance and at the moment it is the frontrunner...


Because I want to do a white-on-white embroidery to the final garment, my wife asked why I don't simply use a plain white canvas (which she then handed to me). I might, but the reason I've been mentally steering away from the idea is that I didn't want to do that much embroidery. I was looking to do accents and patterns and generally practice my stitches as you do on a sampler.

So... I think I may have found my fabric! I'll keep digging and let you know how it goes.

NEXT: Construction Stitches, why they're important and how to use them...

22 November 2005

Crewel World

Sorry for the obvious pun.

Since I'm still waiting for The Hotrod to get it's act together, I decided to keep myself from getting either too bored or too wrapped up in any video games by taking up the embroidery needle. Yeah, I called our sewing machine "The Hotrod" I told this was a guy's sewing site.

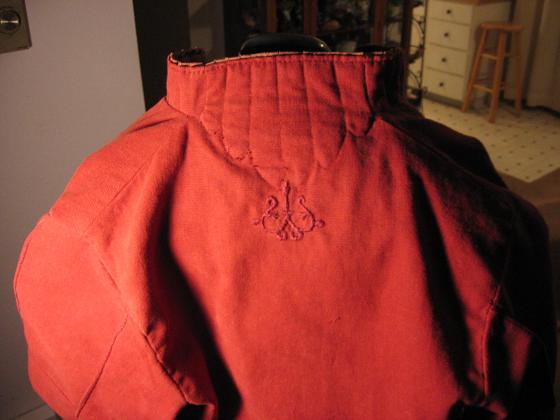
Anyway, for fun I did a raised satin stitch embroidery at the base of the neck using 1/4 of the tile design I used on my rapier carrier. Why at the base of the neck? No reason. I just thought it echoed the lines of the quilting and would look good there. Also there wouldn't be anything covering it up (baldrics and the like tend to cover the chest).

And - for those who didn't get the pun - this kind of embroidery is known (collectively) as "crewel work".

Mostly, I'm practicing because I plan to do some hand-embroidery on the final noble garment and I haven't done any embroidery in awhile.

It sort of looks like a glyph or
protective ward of some sort, doesn't it?
Speak this glyph and summon Great Cthulhu
from his watery home...


This shot is just to show the orientation.
I don't really plan to do any more, this is sort of a one-off
because I was bored and had a needle and thread handy...


A closeup of the (complete) design as
I incised it in the leather of my rapier carrier.

Oh! And for the record: Not all that long ago I said something to the effect of I avoided hand stitching if it wouldn't be better that way than doing it on the machine... I wanted to make it clear thatI don't think my embroidery is better than what a machine can do. Quite simply put: We don't have an embroidery machine so Scottie gets to practice his stitches.

20 October 2005

Great panes...

Disclaimer... If I dug though my old text books from art school I could probably come up with a better name for this feature than 'sleevelet'. But the books aren't in a convenient place at the moment, and I'm too lazy. Not to mention that in the big picture, nomenclature doesn't seem all that important at the moment. If anyone has a 'proper' term for it at their fingertips they can email it to me, but in the meantime I'm going to stick with 'paned sleevelet'
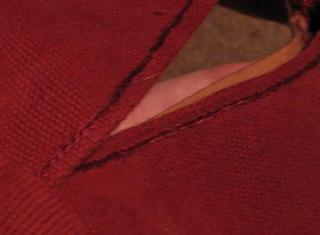


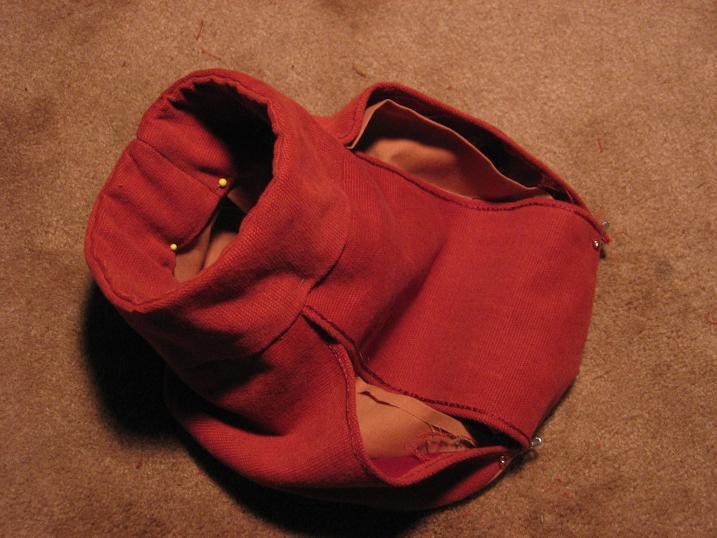
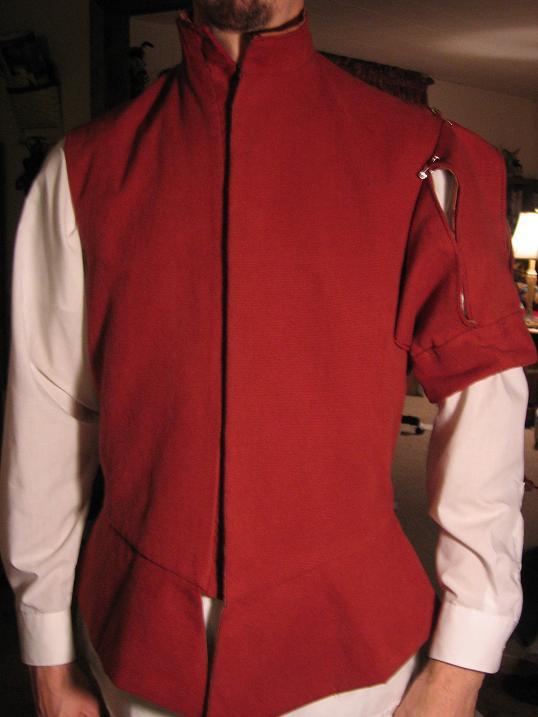
I finished the rows of straight chain stitches on the panes and I've assembled the sleevelets. Below is a pic of the cuff with the panes sewn into it before I turned it and tacked it down. The cuff piece has a arch to it, which is why I clipped the edges prior to turning as you can see.
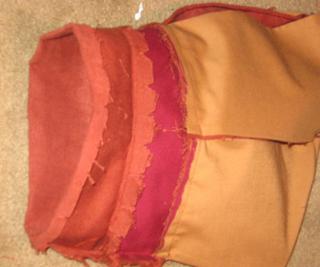

The dark burgandy layer is the canvas I used to interline the pieces. Yes, I know, I said something heartfelt in a previous post about interfacing being easier than interlining. Keep in mind the other things I said about only using modern conveniences where I can get away with it. In this case I think that modern interfacing would make the lines too stiff and starched-looking. Since an interlining is essentially only attached where the stitches hold it, it can give pieces like the panes and cuff of my sleevelet structure without forcing them to hold thier shape to an almost starched extent.
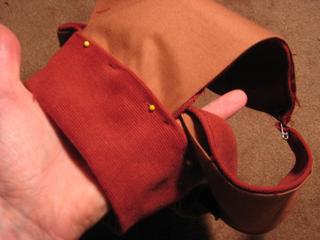
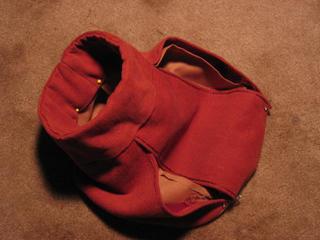


Trimmed and turned. At the moment it's just pinned together to check the shape and see if adjustments need to be made before there are too many seams to pull.
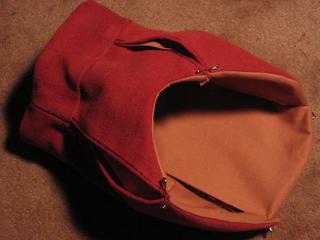


This is the scrye where it will eventually be joined to the body of the doublet.

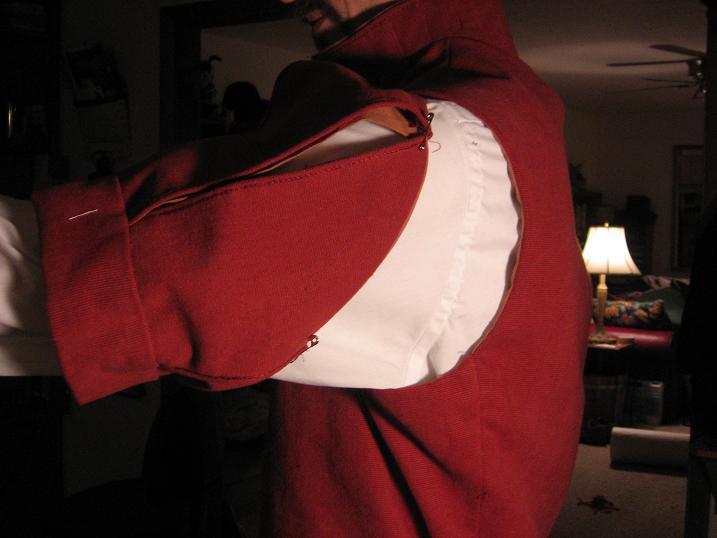
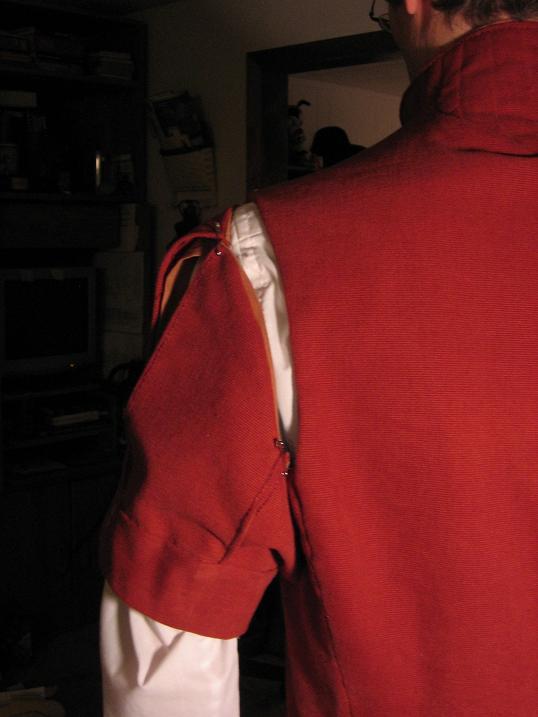
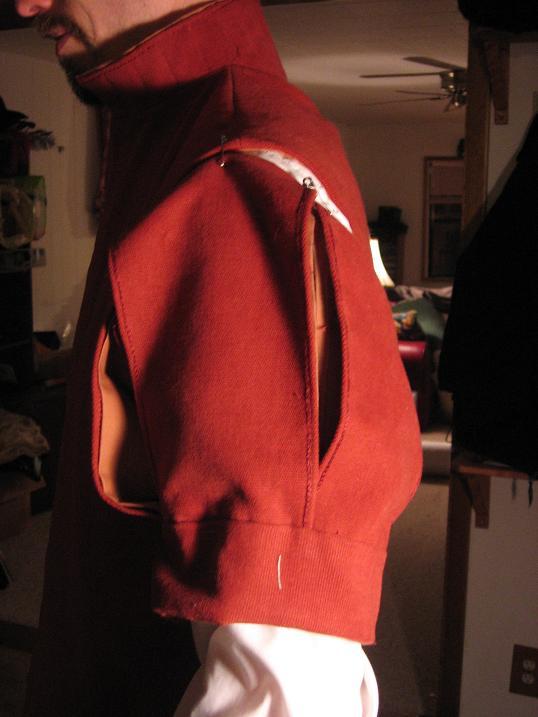
Since I've never made a sleeve treatment such as this one, I thought it meet that I should pin and pose, trying out the thing and making 99.9% sure I got it right before I actually sewed it on. The sleeves of the doublet will be laced on, because I prefer that method overall, but in the Moroni painting the jerkin I am copying looks like it's been sewn into the armscrye. This is unusual according to most of my reading, but the painting shows no visible signs of lacing or points holding the sleevelets in place, so neither will this jerkin - or the final one.

Note: I didn't have one of my usual 'renaissance shirts' handy, so I'm wearing a white dress shirt in these photos. It doesn't really matter because at this point I'm just testing the angle. The 'bulky armpit' tests will come later when it's tacked on a little more securely and I can get a real feel for how it will go. The nice thing about panes is that they can be moved to expand or contract around as much or as little thickness of fabric as I am likely to find going through that armhole anytime soon.
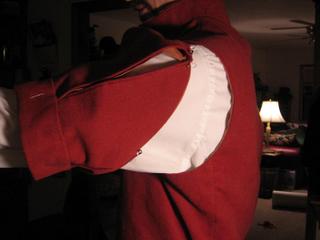


At Extension
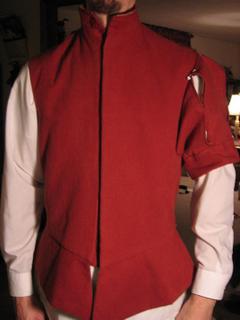


Front
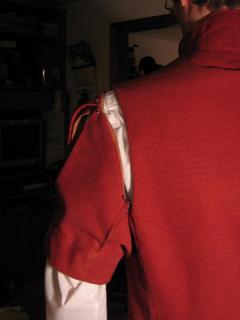


Shoulder back
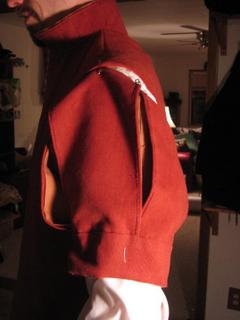

Shoulder profile

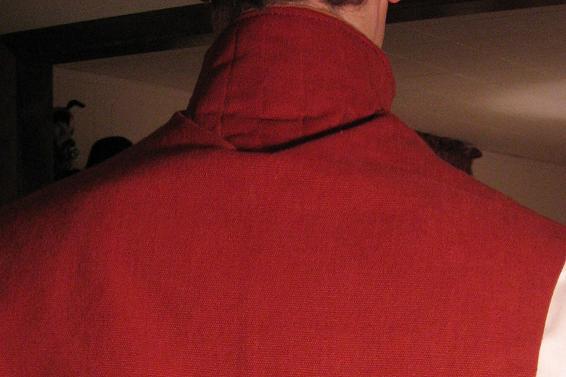
I'm pleased so far with the similarities with the jerkin in the painting. There is a small issue at the back of the neck, however. It is possible that partially quilting might not work in the long-run. The point where the quilting stops has a pucker that just won't go away. I'm still looking for solutions to this (other than quilting the whole damn thing, of course). Maybe some of that cheap ultra-flexible boning they sell at fabric stores or some broom straw or something... I'm sure I'll figure it out eventually.
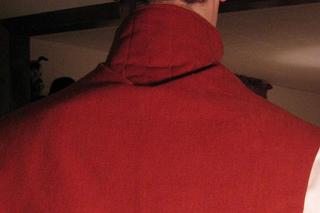


No matter how many times you've done this, the course of sewing garb never runs completely smooth.