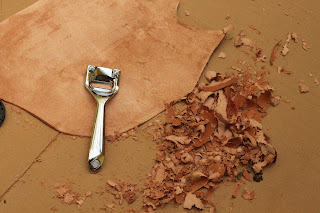
We're not going to build a house, but we are about to get into some fairly involved leatherworking here. "Wet forming" leather requires something to form it around. Usually, this is made out of wood. So, a certain amount of miscellaneous carpentry will be necessary.
It's either that or cast your molds in concrete.
I'm an avid woodworker, so I already have a lot the tools I needed to make the things we'll be talking about in the next month or so. Some of you will too, or someone in your family or close circle of friends will have tools you can borrow.
There are always things that will make a task easier. A jigsaw is faster than a coping saw just as a lathe is faster than whittling. I'll stop periodically and talk about tools if it's necessary, but here's a very minimal list of what you'll need from the hardware aisle.
- Wooden or plastic mallet
- Coping saw
- Scratch Awl
- Tack hammer and/or staple gun
- Sharp pocket knife or woodcarving knife
- Sandpaper
- Care, patience, and a First Aid kit
If you're really lucky, there's someone you can show a picture of what you want and have them come back in a few hours and hand it to you.
NOTE: None of this is terribly complicated. I was 13 when I learned most of this in a shop class at school. If dorky, awkward, 13-year-old Scottie can do this, you probably can too.
As always, if I can think of an easier way to do anything, or find a shortcut for you, I will post it. Even if it's a link to what someone else did.
As far as leatherworking tools go, a lot of what you need you'll already have in your sewing kit. Even if you decide to tool any of the leather, a nailhead or anything can be used to make marks in the leather. Tools specifically to leatherworking can be expensive and if you're not going to use them again, you can skip them.
Yes, you can do leatherworking without buying stock in Tandy. There are some specialized tools that will make all of this easier if you have them, but they're not strictly necessary. You cannot, however, do it without buying leather. For that, you will need to find a local supplier or order it online. I encourage you to check online or in your local Yellow pages (remember those?) and see if you can find a local leather supplier. Most larger cities have them. Here in Seattle area, we have McPhereson's leather.
The leather used for all of these projects is "vegetable tanned" leather. That means the tanning process used tannins from natural vegetation to effect the tanning process. Some places sell it as "tooling leather" because it's perfect for these projects because it's non-toxic, easy to work with and takes tooling and shaping well.
NOTE: Leather is not sold by the yard. The price on the wall might tell you how much per square foot, but that doesn't mean you can buy one square foot of leather. Leather is sold as hides (whole animal) sides (half the animal), bellies (just the belly bits), and scrap. Scrap is usually sold by the pound.
At the moment, a mid-grade full hide (veggie tanned) will probably run you about $140 online. Many if not most of the projects here can be done with large scraps, so you might not need to buy an entire side.
If you want to do a lot this, it's more economical in the long run to buy the entire hide, but it's up to you and your budget.
Go ahead and select some dyes and a sealer as well while you're there. Tell the folks who work there what you plan to do and they'll advise you. Generally, anything that will touch food or your skin should probably be a non-toxic as possible, so pay attention to what's in the dyes you buy and think about how you'll use them.
To work the leather, you will need a couple of tools, some of which you'll already have:
- A knife (I usually use a box knife)
- An awl
- A plastic spoon (yes, really)
- Glover's needles (available at most leather or sewing stores)
- Sinew or strong thread
- A ruler.
- Skivving knife
- Stitch-spacer
If you have those things, you're ready to start.


