Showing posts sorted by relevance for query Demo. Sort by date Show all posts

26 February 2008

Pad-stitching (With Demo)

The stitch at the top of the list of stitches I don't usually use but should has to be the pad-stitch.

If you have been with me for awhile, you'll remember the jerkin I made with the quilted collar and all of the fussing I did with that collar to get it to work. I cannot tell you how much better that garment would have turned out had I used the pad stitch to arrive at the effect I wanted instead of machine stitching the thing... well actually I can tell you, or at least I'm going to try.

What is a Pad Stitch?
The Pad Stitch is a method of bonding several layers together - without applying adhesives - into a single unit so that they move as one piece and are stiffer than they would be individually.

That's a long, technical, way of going about saying that this is the period method we imitate with fusible interfacing. The pad stitch can bond as many layers as you like together in such a way as they will move as if it's one thick piece of cloth. Janet Arnold notes one such application in a period doublet in which the collar bears "striped wool pad-stitched over two layers of linen, and another layer of wool." This is just the stiffening layers for this collar and does not include the outer fabric, interlining or silk lining! Now that's a collar that's not about to flop around in a breeze!

Pad-stitching is a simple zig-zag stitch. Essentially you're making "Z's" with the diagonal on the front and the horizontal arms underneath, connecting them, like you see in the image above or the illustration at the right (click for a larger image).

The pad-stitch can be used anytime there are multiple layers of fabric to be bonded together and can even create a quilted look if applied correctly. Had I pad-stitched the collar of the aforementioned jerkin, there would not have been as much loss of girth and I probably would not have encountered some of the issues that I had to cope with.

Why Bother?
Even if you machine-stitch the whole garment, pad-stitch the collar and belly by hand. The stitch tension is infinitely easier to maintain and the final effect smoother if you're in full control of the thread with every stitch, varying it as the sewing demands. No machine I've ever encountered can do that... not even the Hot Rod.

As you can see in the orange doublet (left) I blogged about awhile back, the straight channeled stitches pull the fabric down into a 'ditch'. This is fine on a flat quilt because quilters know to account for this 'shrink' as each successive line of stitches pulls the fabric across the entirety of the quilt and accounts for a 'loss' of several inches of fabric on a side. Quilted garments made in this fashion did exist (hand-quilted, of course), but the stitches were comparatively loose and the garment oversized to compensate for the rate of shrinkage.

Pad-stitching the same part of the same garment would have drawn in less fabric, thereby creating less shrinkage problems and been appreciably more period in its final effect. These stitches are normally hidden in the inner workings of your doublet, but the 'back' of the stitch can also surface to create the quilted effect, as Janet Arnold noted on the collar of the 'Nils Sture' leather doublet and as you can see on the garment to the right. (click for larger image)

Tudor Tailor, Margot Anderson and many other pattern makers and books on costuming covering the 15th and 16th centuries advise using a natural cotton quilt batting to stiffen collars, peplum, and fill out the bellies of peascod doublets. This is what I tend to do. You can resort to period stiffeners if you want. As I mentioned, Janet Arnold specifically notes the prevalence of multiple layers of wool, linen and buckram in the extent period garments she analyzed for her seminal work Patterns of Fashion. That's all well & good for you, but it sounds a little too hot since I mostly wear these garments in August. One layer of cotton batting breaths a mite better than multiple layers of wool.

Where should you use it?
As I already mentioned, the collar and the belly are the two most common places you will find padding and therefore the pad-stitch. That being said, it can be used just about anywhere that two or more layers of fabric need to be bonded so as to move without hindering one another. Another common area is the back, and I tend to add a stiffening layer in the belly region even if I'm not padding it out peascod-style.


How do you do it?I haven't done a demo in awhile, so I thought this might be a good time and a good subject for me to begin again with...

As I said, and as you can see from the illustration up above, it's pretty much a simple matter of even zig-zags in parallel rows up and down the garment, each penetrating only deep enough to catch the next layer.

For this demo, I used plastic canvas in two different colours to better differentiate the layers, and substituted red yarn for the thread to make certain the images are clear. The only difference between what you see me doing here and what you will be doing on your garment is the regularity of the holes in the plastic. As with any handstitchery you do (outside of embroider on even-weave linen) you won't be able to count holes to keep your stitches nice and even.


Start your first stitch by making a "Z" with the top and foot of the
letter on the back and only the diagonal showing on the front.


Continue down the row as far as the size of your fabric or your
desired design allows or calls for. (Notice how when I hold it up
to the light that you can see the full zigzag? This is what you
want to see.)


End each row with a long horizontal stitch, bringing you in line
with your next row. Some people like to work these so that the
diagonals form chevrons. It doesn't make any difference unless
someone's going to be able to see it.


If you're going to make your stitches visible from the outside of the
garment as on the collar above, you should practice making the
back as even and careful as the front. I confess that when these
stitches will be hidden I don't spend a lot of time sweating such things.


The end result is two pieces of fabric that move as one.
Nice even stitches in parallel rows will bond the fabric together
until it moves as one unit, as you can see above.


NOTE: If you're doing a piece that will have a permanent curve on the final, you can further eliminate wrinkling and shrinkage from 'quilting' by working the piece over a curved surface: your knee, a bolster, a rolling pin or whatever maintains the desired curve as you're working. I've even appropriated a kitchen cannister before to act as a stand-in for my neck. A smooth final product is the desired result, use whatever you need to achieve the best possible result!
Fair warning... This activity is known to attract onlookers!

Good luck!
- Scott


07 March 2012

Stitching Demo: Eyelet Engineering

Today, we're going to poke some holes in fabric and then we're going to reinforce the holes so that you can poke a bit of ribbon or cord through the hole repeatedly without tearing up the fabric.  There's a trick to this that makes it very similar to making button holes but also vastly different.

The difference is engineering.  

Yes, engineering. Go with me on this one.

The similarity is the stitch we're going to use. Depending upon whom you rely, this is either called the buttonhole stitch or the blanket stitch. The only difference between the two is whether the knot is at the top (away from the edge) or the bottom (on the edge). Call it by whatever name pleases you.

Since we're trying to make a hole and keep it open and fairly large, we're going to opt to not have the knot in the opening.

If you go to this website: The Wonderful Microworld you will find some beautiful pictures of various fabrics placed under a microscope. Most fabrics, at their basic structure, form a grid pattern, which is why I usually use plastic canvas for stitching demos.  The longitudinal threads are called 'warp' threads and the latitudinal threads are the 'weft'.

Because this demo will require me to move threads out the way, plastic canvas won't do it, so we're going to dig into the kitchen cupboard for some cheesecloth.  Cheesecloth is fantastic for this because it looks like a blown-up picture of a piece of fabric, so you will be able to see what's going on to a degree that a more densely-woven fabric would hide from you.


It also acts quite a bit differently than a more densely-woven fabri in many ways. It stretches and pulls and snags and otherwise fails to keep its shape without a bit of help.  You certainly wouldn't want to sew a doublet out of it. For the purposes of this demonstration, however, it will perform on a large scale just as a denser fabric will.

For making eyelets, the toolbox is pretty basic. You just need a long pointy thing like an awl. I got mine at the hardware store.  (Actually that's a lie; my wife bought it at the hardware store and I swiped it out of her sewing box. Don't tell her.) If you don't have an awl handy, just about anything will do: a knitting needle, a pencil, a chopstick, a sharpened dowel... you get the idea.


The reason we're going to study how to make them is because men's clothing in the 16th century required a lot of eyelets. And they have to be made strong and made correctly because they're going to be keeping your pants from falling down.


You're going to be making a lot of them, so get used to the idea.  Honestly, they're a lot simpler than button holes, but you'll be making a lot of those too.  If it makes you feel better, you can use the machine for the buttonholes if you feel the need.


I've never had much luck with machine-stitched eyelets. I advocate doing them by hand.


NOTE: We're going to be poking holes, not cutting them. Put away the hole punch and grab out the pointy things.

Why not use a holepunch? We cut buttonholes, after all. It would be a lot easier to make them whatever size I want if I can just cut a hole and sew around it. For an explanation, take a look at the professional, no expense spared, professional illustrations below.
A punched hole is surrounded on all sides by broken threads. 
Even metal reinforcement (grommets) will eventually pull out.
An eyelet can be pulled in any direction, unlike a buttonhole.
In a button hole, cutting the fabric will not compromise the integrity 
of the fabric.  When the fabric pulls left, the button (the red circle in the 
image above) holds fast and the stresses are borne by the uncut threads
perpendicular to the cut (highlighted in yellow).

See? I told you this was about engineering. Like anything you build, you want as many support structures intact as possible when you are done and as few as you can get away with.  In other words: thread good, grommets bad.

STEP ONE: Poke a hole
When poking your hole, work carefully, slowly, and breaking as few threads as possible.  The idea is to push the threads aside as best you can. Use steady pressure and twist as little as possible.


What you're striving for is what you see below: A hole with very few broken threads, where the threads have been pushed aside to make a very dense ring of compressed fabric around your hole. 

This reinforces the eyelet and makes it as strong as possible.


Remember that eyelets might be stressed in any direction, so you need them reinforced on all sides.


STEP TWO: Sewing
You're going to be making a buttonhole stitch just like we did the other day, only this time with the knot drawn away from the hole.
Begin by passing the needle through your hole and up through the fabric.  The point of the needle will always point away from the hole. 

Loop the thread over the needle and let it trail away, drawing the needle through the fabric so that the trailing thread makes a loop around your sewing thread.


Let the trailing thread form the loop.


Repeat this stitch all around the hole (these are exaggerated as always for the sake of clear photography) turning as you go, always drawing the thread out and away from the hole.


The finished product should look something like this.  


The knot is away from the hole, so it's not narrowing the aperture. The stitches are holding the warp and weft threads away without breaking them, so it's strong.

20 February 2012

Green Jerkin at the Met

Recently, someone brought to my attention this wonderful green velvet jerkin with gold embroidery in the textiles collection at the Metropolitan Museum of Art in New York City.

If you click the small image at left, you can go to the Met site and view and download some beautiful high-rez images of the garment for your study.

If you haven't already done so, you really should peruse this collection for ideas. The clothing, embroidery, and accoutrement in their collection is impressive. Even more impressive is their web site and its offering of high-resolution images for historical costume study.
Note that the doublet isn't a solid green velvet, but rather a multicolor fabric that reads as green from a distance. It's a weaving style we see in carpets and upholstery fabrics every day. I can't say for certain how much of that is due to age and the color-fastness of the composite threads, but considering the overall preservation of the fabric, it's hard not to take this as intentional.

There are four very small things on this jerkin that I might've missed had I not been able to handle the garment proper or zoom in as much as they allow on the Met website.  All four are immediately relevant to what we've been discussing lately regarding thread-covered buttons and button holes.

One: Note that the wrap of the complete button at the top of the image is not secured along the sides. It is a wood core, wrapped latitudinally and then gone over longitudinally with more threads that are secured at the pole by a bit of gold purl. 

Two: Note how open the buttonhole stitches are and how they are rounded at the ends rather than squared off as I did in the demo a few weeks back.

Three: Here you can actually see the wood core of the button exposed as well as the method of attaching the button to the doublet: a loop at the base of the button rather than sewing the button directly to the doublet using the threads that wrapped it as some advise. You can also make out the thin strip of gold leaf that wrapped the threads unraveling and coming away from the inner core.

Four: Where he buttonhole stitches are coming undone from the velvet, you can see the double-row of grey (probably linen) stay stitches that still hold the buttonhole secure from raveling. 


21 February 2011

Arbuckle Rogers -- Steampunk Flying Ace

My house getting torn apart to make it more hypo-allergenic.  At the end of this, I'll supposedly have a happier, healthier me to share with you and 80-90% less Lego Head to worry about.  Unfortunately, this has also put some of my leather-sculpting plans on hold. 

In the meantime, let us digress somewhat into the realm of science fiction for a leather working project of a wholly different sort...

One of the iconic pieces of hardware in the science fiction arsenal is the jetpack. So much so that it has become an item worthy of simultaneous homage and lampoon.  Every kid wants one, every futurist, science fiction author and movie director is simultaneously frustrated and bemused by the insistence that the future just isn't the future unless it includes rocket belts.

I'm as guilty as the next for reminiscing fondly of the days of yesteryear when commuting by jet pack was always just around the corner.  I featured them in my humor-laden paean for golden-age sci fi Howard Carter Saves the World (click to read it free online).

All of which handily ignores the that you can now buy a "jet pack" from these guys for roughly the price of a decent sports car.We'll bow to the zeitgeist and keep pretending that the future is still just out of reach.

Enter the Steampunks. Not content with reenacting actual Victorian history, we've made it something of a mission to imagine the greats of modern science fiction as if they'd been written by Jules Verne instead of George Lucas. I did this with my "Arbuckle Rogers" costume, which brings us back to jetpacks and leather working.

Since WWI comes right on the heels of the Victorian era, as you might imagine, there's quite a bit of bleed-over into steampunk. This is in part owing to the fact that Steampunk relies heavily on the conceit of the "Airship Pirate" which itself often means the application of 1920's level lighter-than-air rigid airship technologies.

And since the Victorians didn't have a fully-developed aviation tradition of their own to speak of (well, they did, but it didn't come with snappy uniforms) and in the adoption of the so-called "Punk" aspects of this, a certain raffish WWI Flying Ace demeanor has come about.  That's where the leather biggin caps and goggles come from, mostly.

And indeed, my chief dissatisfaction with the Arbuckle Rogers costume is that I didn't -- at the time at least -- have a decent leather jacket appropriate for the milieu.  But the other day, I was wandering the aisles of a thrift store when I discovered the perfect jacket to rectify that problem.

It was decent leather, a little weathered and minus the liner, so it came to only $15.00


 A lot of people do the steampunk jetpack schtick.  I plan to do it differently.  Because I said to myself: If you really had flights of jetpacked soldiery winging their way across the skies, how would you tell your guys from the other guys?  With planes it's a bit easier because since they're coming from different engineers and different factories and design traditions, etcetera, you can spot them from afar and know a Fokker from a Sopwith.

That would be a bit harder with people.  Which brings us to the painting.  Even though both the Germans and the Royal Air Force allowed their pilots a lot of latitude on decorating their kites during the early days of flight, they quickly devised a system of painting and numbering to keep track of them and to tell quickly and easily from the ground who was who.  (At least theoretically)

I posit that this would be even more necessary with flights of jetpacked humans.  So I'm devising a paint scheme for my jacket that is inspired by RAF paint schemes used at the dawn of aviation.  Why?  Because as far as I can tell, no one else has yet done so.

I have some remodeling work to do.  I apologize for the delay in the leather sculpting demo.  And I'll be back soon to discuss paints and designs.

Cheers!

26 May 2012

Making Leather Commedia Dell Arte mask - Tutorial and Demo

In case you ever wonder about why I take so long to complete some of these projects, I'm always working on something, even if I'm not blogging about it. I've been working on commissioned masks in the commedia style.  I'm not going to turn this into a maskmaking blog, but I did a tutorial series awhile back on making a miniature version of my favorite mask.

Maskmaker, Maskmaker, Make Me a Mask

Part One: Planning & Carving
Part Two: Carving & Completing the Matrix
Part Three: Prepping the Leather (Skivving Tutorial)
Part Four: Molding the Mask (Wetforming Leather)
Part Five: Finishing the mask

Now if you will please excuse me, I've miles to go before I sleep...


17 July 2009

Site layout changes...

I spent the day embroidering a lid for my new belt purse and it's almost done. Photos will be posted soon along with the Manly Pursemaking Demo. (Don't worry, you won't have to embroider anything if you don't want to. I'll show you how to get around it!)

Blog Template Updates
So... the site template is all new.
What do you think?

Is it better? Is it worse? Be honest! Use the comments below because I've never had much luck with Blogger's "Poll" widget.

22 July 2012

Leather mask making: Sculpting with reluctant media


Real woodcarvers wear pink. (ahem)

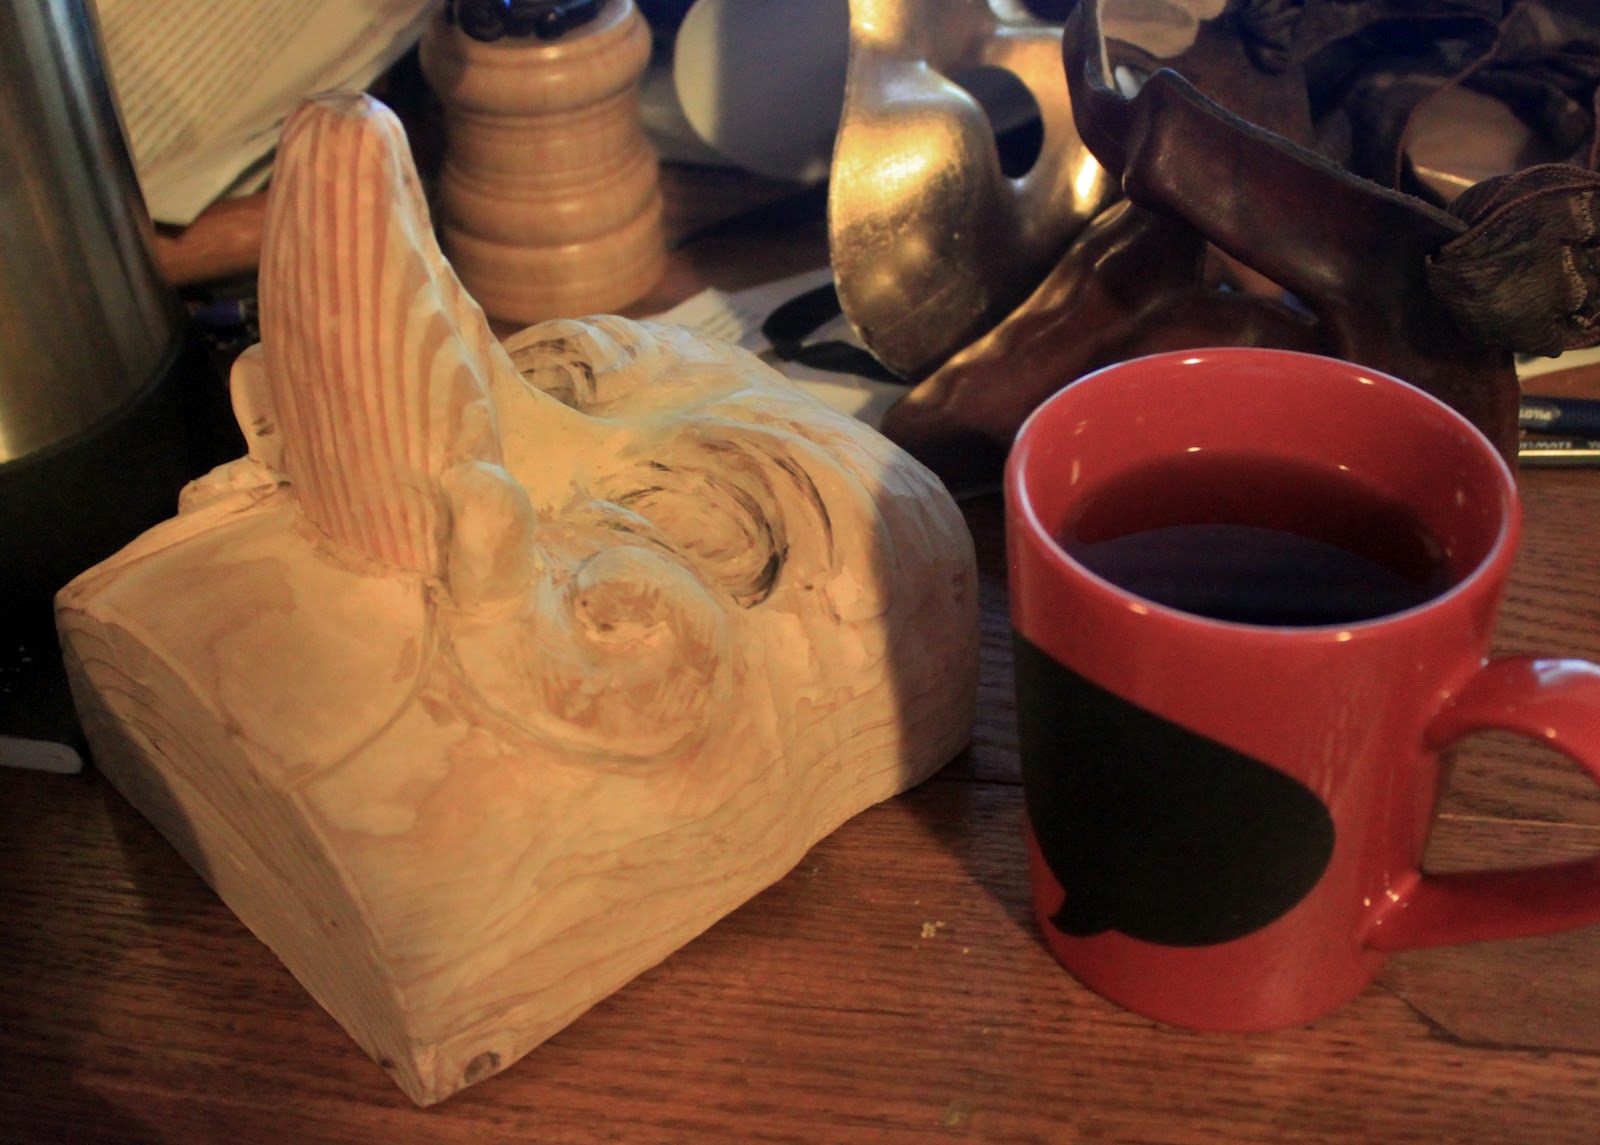
The trouble with being on the road so much recently is that you can't take things like masks and wood with you. On the road, it's handsewing; at home, it's all about the carpentry. So I've been clearing a backlog of masks that I promised to folk, which means a lot of carving and a boatload of forcing leather to do things it doesn't want to do.

This is why I often call myself a sculptor of reluctant media. Between the wood and the leather, my hands are full just discovering the way they want to go and then trying to get them to go there.

This is starting to look like a leatherworking blog rather than a broad-scale costuming blog and for that I apologise to anyone who doesn't want me to dwell on wood and leather and would like to see a bit more cloth. I'll get back to cloth soon. I promise. In the meantime, here's some more leather mask making.

If you are new or looking for instructions on how to make commedia dell arte masks, or just leather masks in general, you will find a tutorial here that gives you the basics of the craft. Yes, the craft. The art of the thing is up to you to bring to the table.

Try as I might, there's only so much of this that can be taught in a blog format.


I mentioned the horn mallet in passing in my demo on the tiny mask. They're kind of a pain
to make, but no one sells them, so make them you must if you want one. "Drill hole, epoxy
handle into place" is a deceptively simple set of instructions. A lot of fussing and cussing is
involved. Most of the other tools used to do this thing can be purchased anywhere that clay
tools are sold. Assuming you don't want to make those too.


The horn mallet not only helps shape it by forcing it down into the grooves and valleys of the matrix, it also compresses the leather, stiffening the mask. The dimples can be smoothed out or left as a texture. I like leaving the dimples around the periphery of the mask and sometimes in the valleys. Texture helps those areas recede visually. (Domino-style minimum coverage zanni mask, commissioned.)


These masks are notoriously difficult to photograph. Note how the dimpled texture helps define the high points from the low. Combined with the shading provided by an careful application of the dye, the mask takes on additional dimension and character. The nose seam on this one was a bit of pain. (Domino-style minimum coverage zanni mask, commissioned.)


I just love this color. The challenge here was making a mask that was non-threatening and cheerful. Most zanni masks tend to look a bit maniacal under the best of conditions by design. Raised brows and wide-open eyes are part of the recipe. I also borrowed the Arlechinno spiral cheeks (which I'm told was historically meant to indicate a handlebar mustache -- automatically awesome).


The trick to pulling off a large full-coverage nose like this one is the inevitable seam where your leather wraps around the nose. I've heard it described in a dozen places, but really this is one of those things that you have to figure out for yourself. This is where craftsmanship is king.


Mask matrices can be re-crafted a couple of times. For a one-off commissioned piece, I'll use the matrix in its original form only that one time. This one has had the nose shortened and re-positioned and cherubic cheeks added using wood putty. Recycling is good.


When I retire mask matrices as I have these two, I usually put a hanger on the back and hang them up on the wall, which is the fate that these two are currently awaiting. 

13 January 2012

Buttoning-Up Three (The Button's Revenge!)

Mea Culpa... during a discussion on the Elizabethan Costuming Facebook group, I realized that I prepared this demo on cutting and sewing buttonholes by hand but never posted it!  Well here it is. Better late than never, I suppose...
- Scott

----------------------------------


In the previous posts, called "Buttoning-Up 1 & 2" I discussed making your own buttons out of beads and thread. Rest assured that at the end of the day, the pain pays off, as we sew them onto the doublet and undertake the tedious and often nerve-wracking task of cutting and sewing the button holes...

The buttons in situ.

The first step in the process is figuring out what size they need to be. You can just measure the button with a pair of calipers if you have them, or you can do what I do and grab a strip of paper.

Remember, cloth stretches. Ideally, a button hole will be just the size or even a hair smaller than the button that it's supposed to accommodate.  Make a loop with your strip of paper and wrap it around the button until you're certain that the loop you've made is just the right size for the button to pass through, but only just.

The length of button hole you need is the length of the 1/2 of your loop.

Measure the button.
Flatten the loop and measure
Transfer your measurement to the garment using a fabric pencil.
I've seen a number of people discuss a number of ways to cut buttonholes. I've heard passionate arguments about whether you should cut them before you sew them or after. Likewise, I've heard the same for how to cut your pinks and slashes and whatnot.

So you should know that there are many ways to go about this,and as always this is how I do it.

I cut them first because it's easier to work with if you are sewing them by hand. Your mileage may vary.

The period method of cutting button holes (as well and pinks and slashes for that matter) appears to be the chisel.  I've tried various ways of going about it and keep coming back to using a chisel. It's easier to cut a straight line than when using a razor, it's faster and less finicky than scissors, and it's the period method of doing it anyway.

When I'm pinking or slashing, I use a woodworking tool that I've sharped to razor sharpness. For button holes, especially those which need to accommodate homemade (non-standard size) buttons, I can rarely find just the right size of chisel in my toolchest.  So for button holes, the 'chisel' I use is a chisel-tip Exacto blade.
The blade.
The blade in the holder.
Because it's an Exacto blade it is razor sharp, so no need to get out the mallet. Just lay it along the line you just drew and press down hard.  Note that there's a cutting mat under my fabric as I am doing this.

Then make your button hole stitches all around the hole you made until you're done.


It's a good idea to check your size to make sure you're  still on track.